CTFd平台部署
介绍
- CTFd最新版(3.5.3)和ctf-whale最新版和0xdevsachin大佬的CTFD-crimson-theme主题
- 赵师傅的ctf-whale和最新版ctfd不兼容,这个教程做了适配兼容(其实就是pip多装几个模块)。
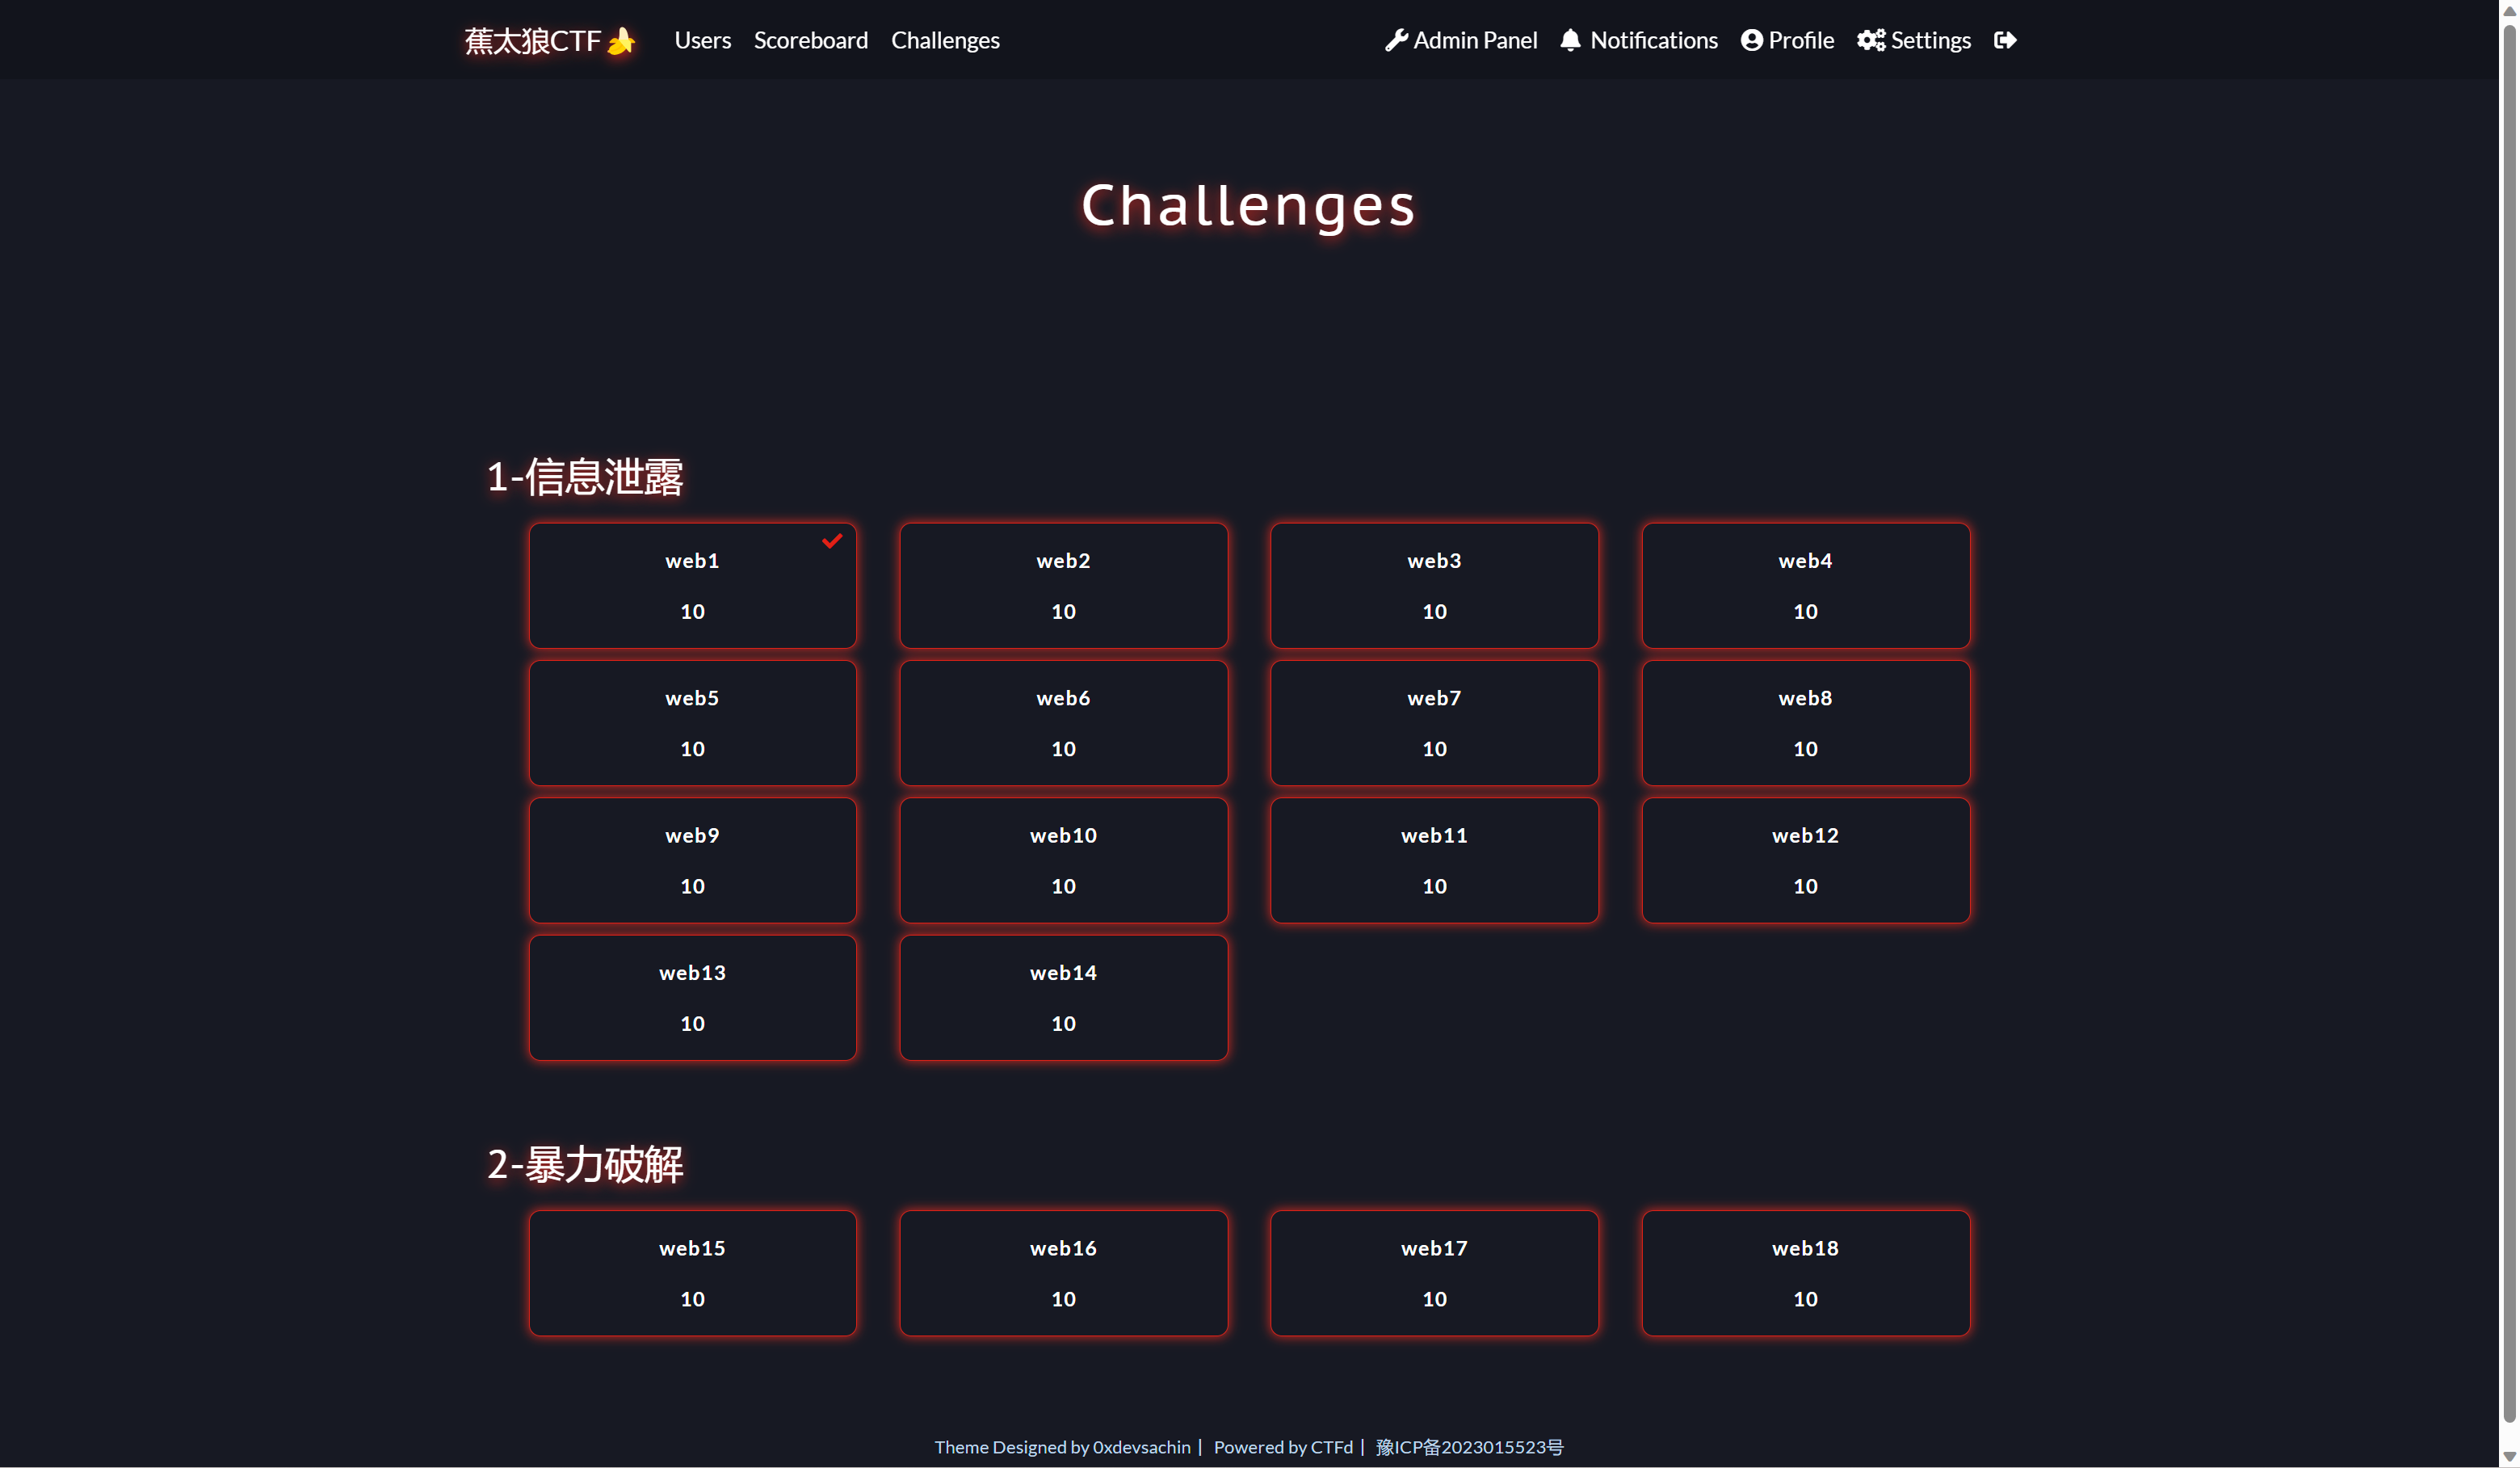
- 鸡督🍌首页是我自己改的。
- 操作系统:Ubuntu 22.04.2 LTS 默认安装版(非mini) 其他系统也行,不过最好是Ubuntu,其他系统可能会遇到玄学问题。
预览图


开始部署
全程在root用户下执行
环境准备
更换国内源
vi /etc/apt/sources.list
#添加腾讯云源
deb http://mirrors.tuna.tsinghua.edu.cn/ubuntu/ focal main restricted
deb http://mirrors.tuna.tsinghua.edu.cn/ubuntu/ focal-updates main restricted
deb http://mirrors.tuna.tsinghua.edu.cn/ubuntu/ focal universe
deb http://mirrors.tuna.tsinghua.edu.cn/ubuntu/ focal-updates universe
deb http://mirrors.tuna.tsinghua.edu.cn/ubuntu/ focal multiverse
deb http://mirrors.tuna.tsinghua.edu.cn/ubuntu/ focal-updates multiverse
deb http://mirrors.tuna.tsinghua.edu.cn/ubuntu/ focal-backports main restricted universe multiverse
deb http://mirrors.tuna.tsinghua.edu.cn/ubuntu/ focal-security main restricted
deb http://mirrors.tuna.tsinghua.edu.cn/ubuntu/ focal-security universe
deb http://mirrors.tuna.tsinghua.edu.cn/ubuntu/ focal-security multiverse
更新源
apt-get -y update
更新软件,必须更新,不然会出现很多未知问题
apt-get upgrade -y
安装Docker&docker-compose
Docker安装
apt-get purge libcurl4 -y
apt install curl -y
curl -fsSL https://get.docker.com | bash -s docker --mirror Aliyun
docker-compose安装
有pip3的就不需要安装了。
wget https://bootstrap.pypa.io/get-pip.py
python3 get-pip.py

pip3 install docker-compose -i https://pypi.tuna.tsinghua.edu.cn/simple
配置Docker集群的模式
由于赵师傅的插件使用的是集群的模式,所以这里要创建一个单服务器集群。
docker swarm init
然后将这个服务器加入集群。
docker node ls
docker node update --label-add name=linux-1 <节点 ID>
docker node ls

Docker更换镜像源
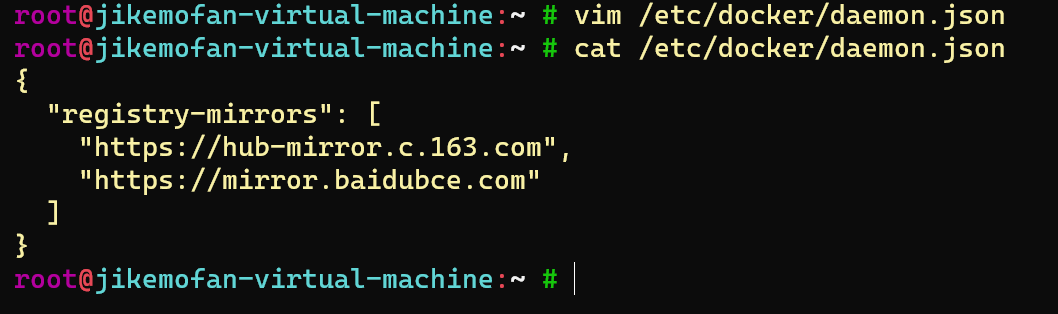
由于镜像服务可能出现宕机,建议同时配置多个镜像。这里一定要保证该文件符合 json 规范,否则 Docker 将不能启动。
apt-get purge vim-common -y
apt install vim -y
vim /etc/docker/daemon.json
{
  "registry-mirrors": ["https://im6noja9.mirror.aliyuncs.com"]
}
 重新启动服务
systemctl daemon-reload && systemctl restart docker
安装CTFd
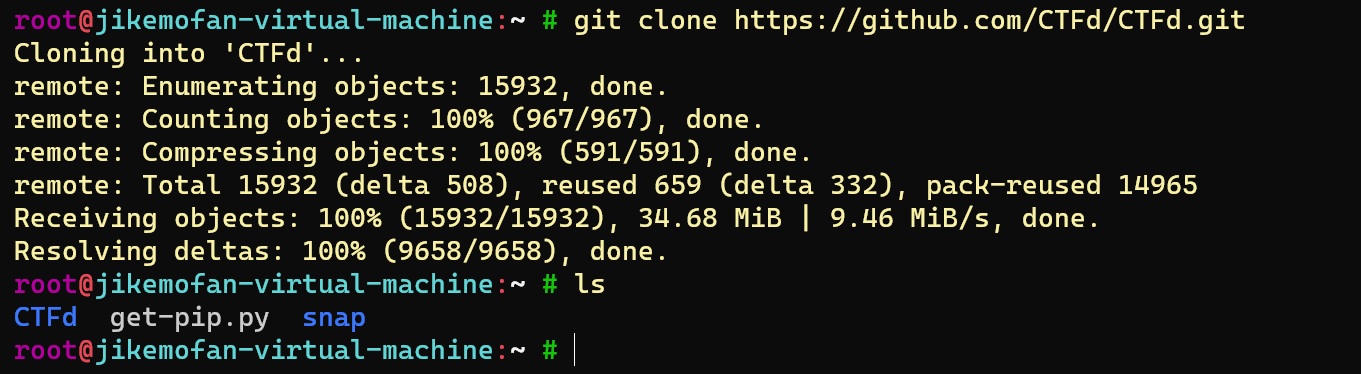
方法一:原始代码安装
git clone https://github.com/CTFd/CTFd.git
配置frp
git clone https://github.com/d3N00t/ctfd_frp.git
cp -r ctfd_frp/frpc/ CTFd/
cp -r ctfd_frp/frps/ CTFd/
#如果需要使用到域名,编辑一下ctfd_frp/frpc/frpc.ini即可。
安装动态flag插件
cd /root/CTFd/CTFd/plugins/
git clone https://github.com/d3N00t/ctfd-whale.git ctfd-whale

ctfd-whale原版不适配我这个教程,做了一下修改,修改的地方比较多,建议直接用我这个。
rm -rf dynamic_challenges
git clone https://github.com/d3N00t/ctfd_dynamic_challenges.git dynamic_challenges
安装主题
cd /root/CTFd/CTFd/themes/
git clone https://github.com/0xdevsachin/CTFD-crimson-theme.git
配置CTFd的构建环境
返回CTFd的根目录
cd /root/CTFd
chmod +x docker-entrypoint.sh
vim requirements.txt
在文件的最后一行添加以下内容:
docker==4.1.0
Flask-APScheduler==1.11.0
flask-redis==0.4.0
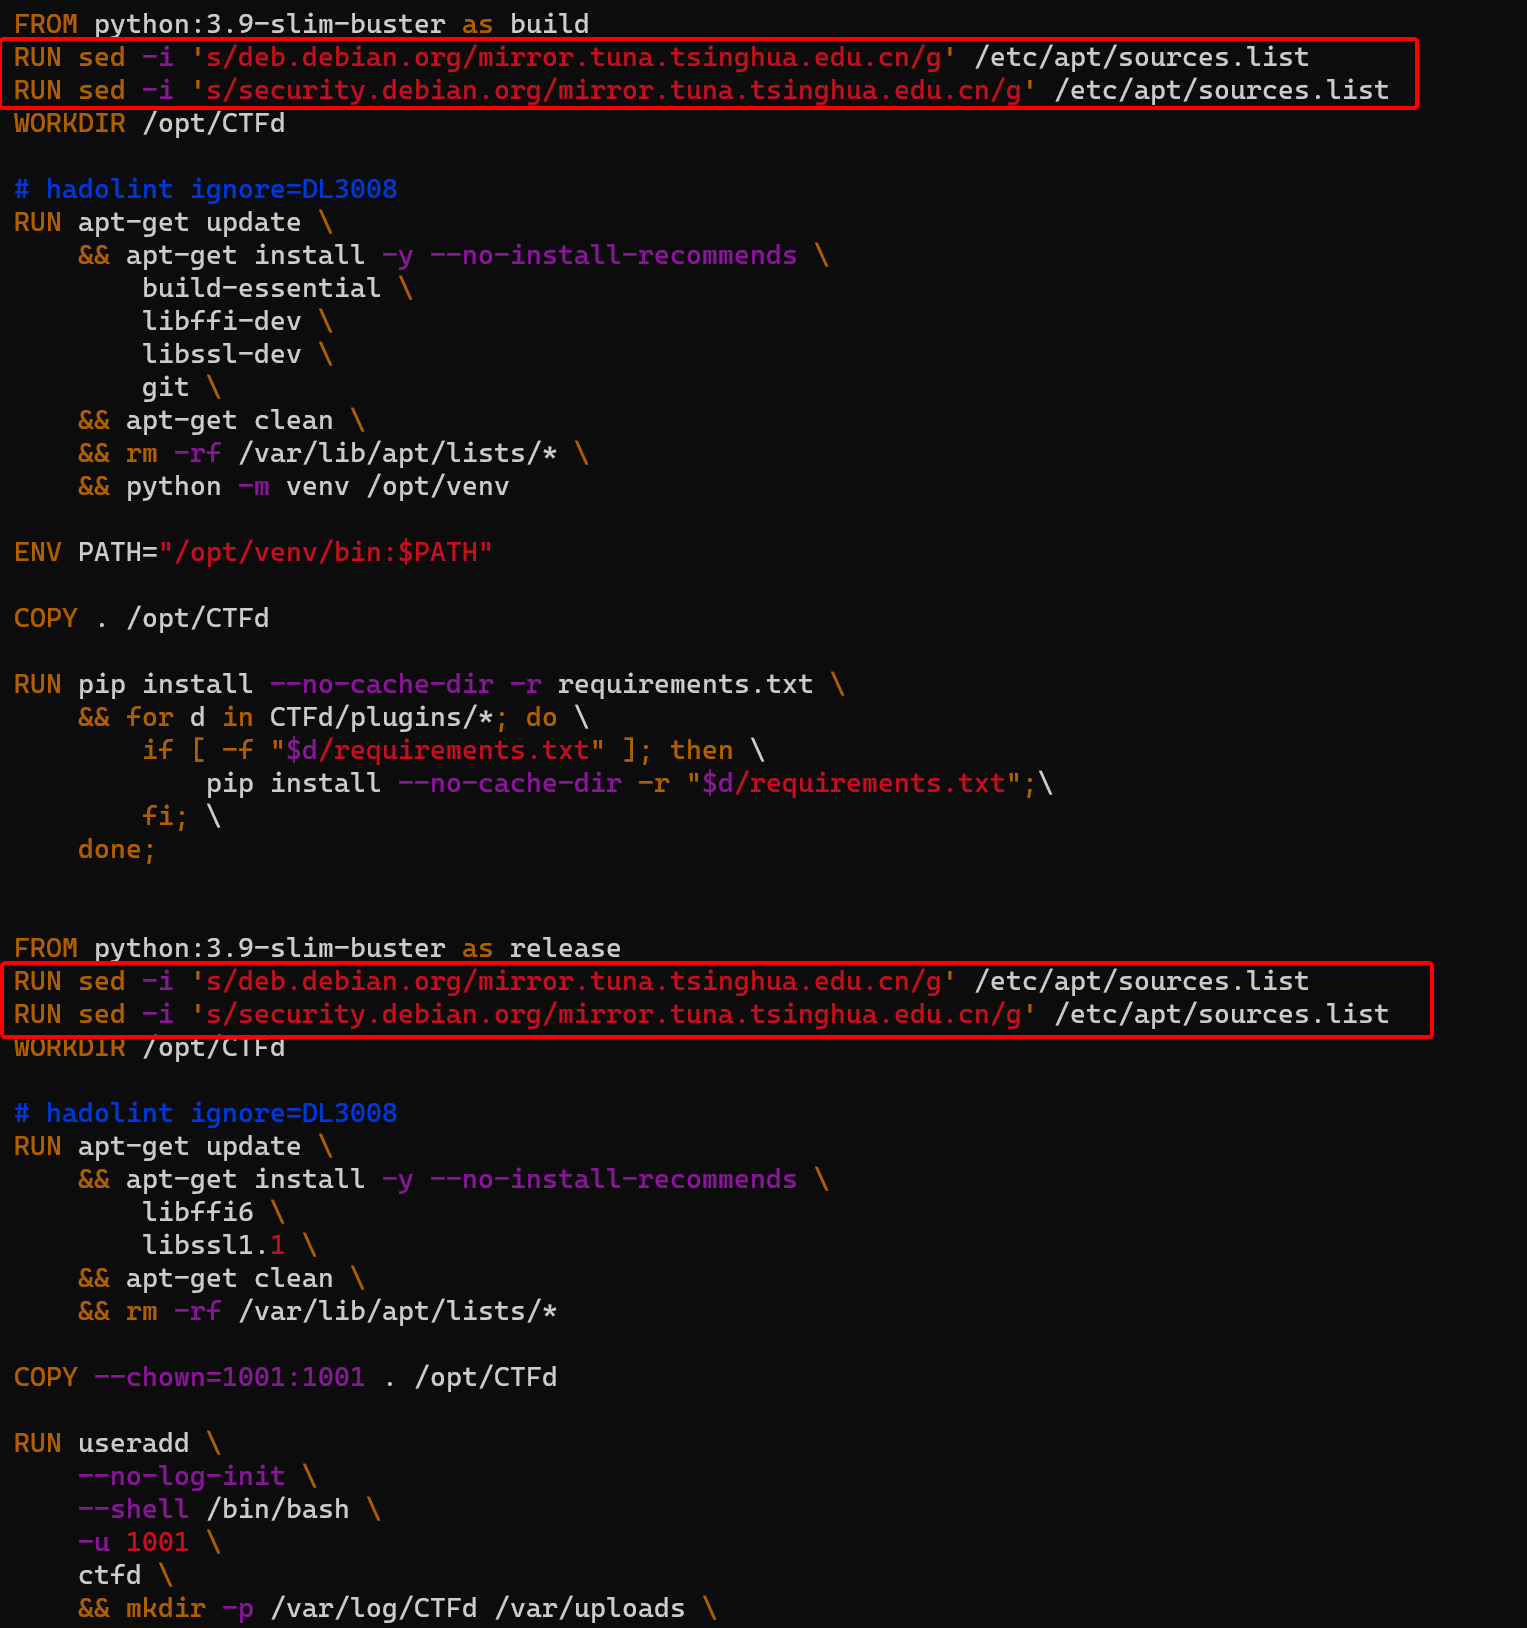
编辑DockerFile
vim Dockerfile
在FROM python字样的下面一行添加下面两行,用于加速apt的安装。
RUN sed -i 's/deb.debian.org/mirror.tuna.tsinghua.edu.cn/g' /etc/apt/sources.list
RUN sed -i 's/security.debian.org/mirror.tuna.tsinghua.edu.cn/g' /etc/apt/sources.list
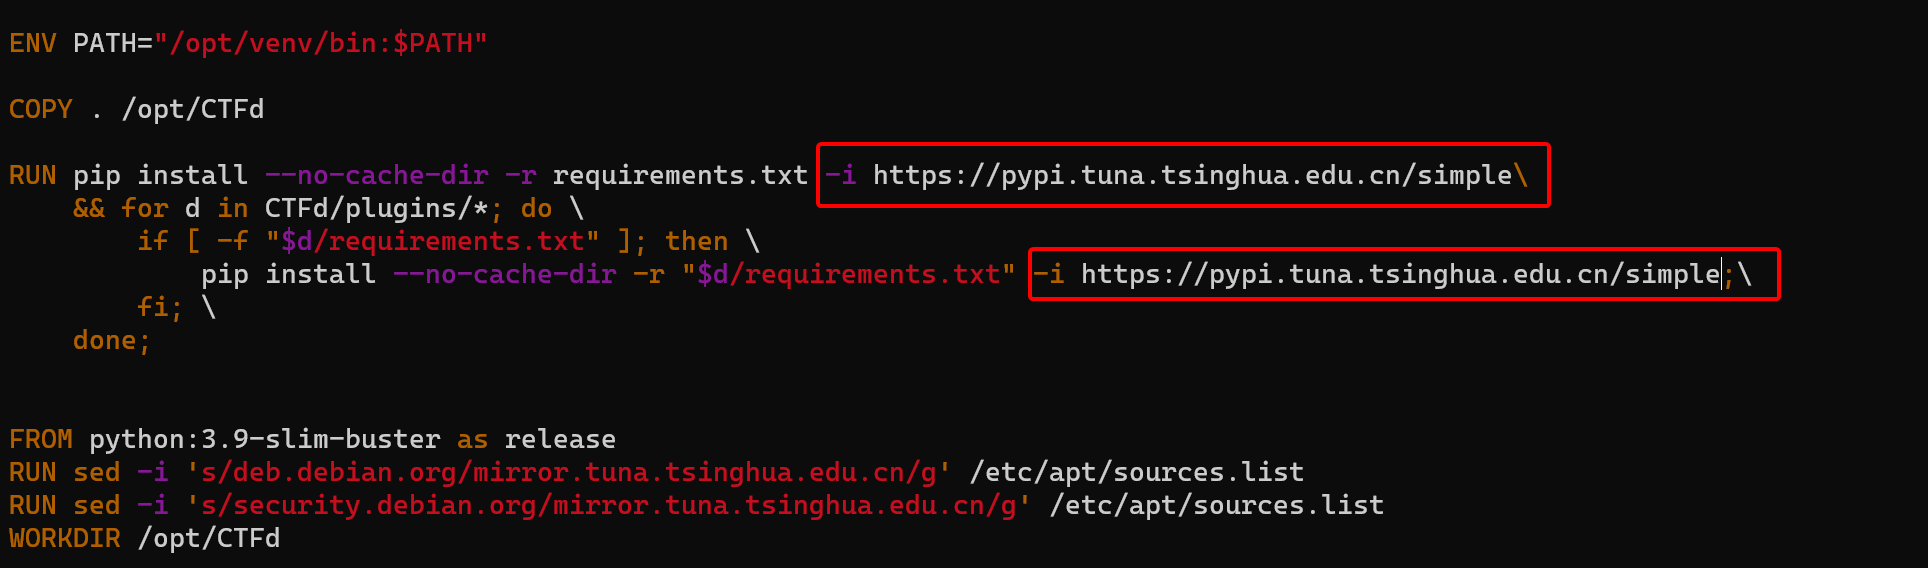
pip inistall后面增加以下内容,用于加快pip的安装速度。
-i https://pypi.tuna.tsinghua.edu.cn/simple
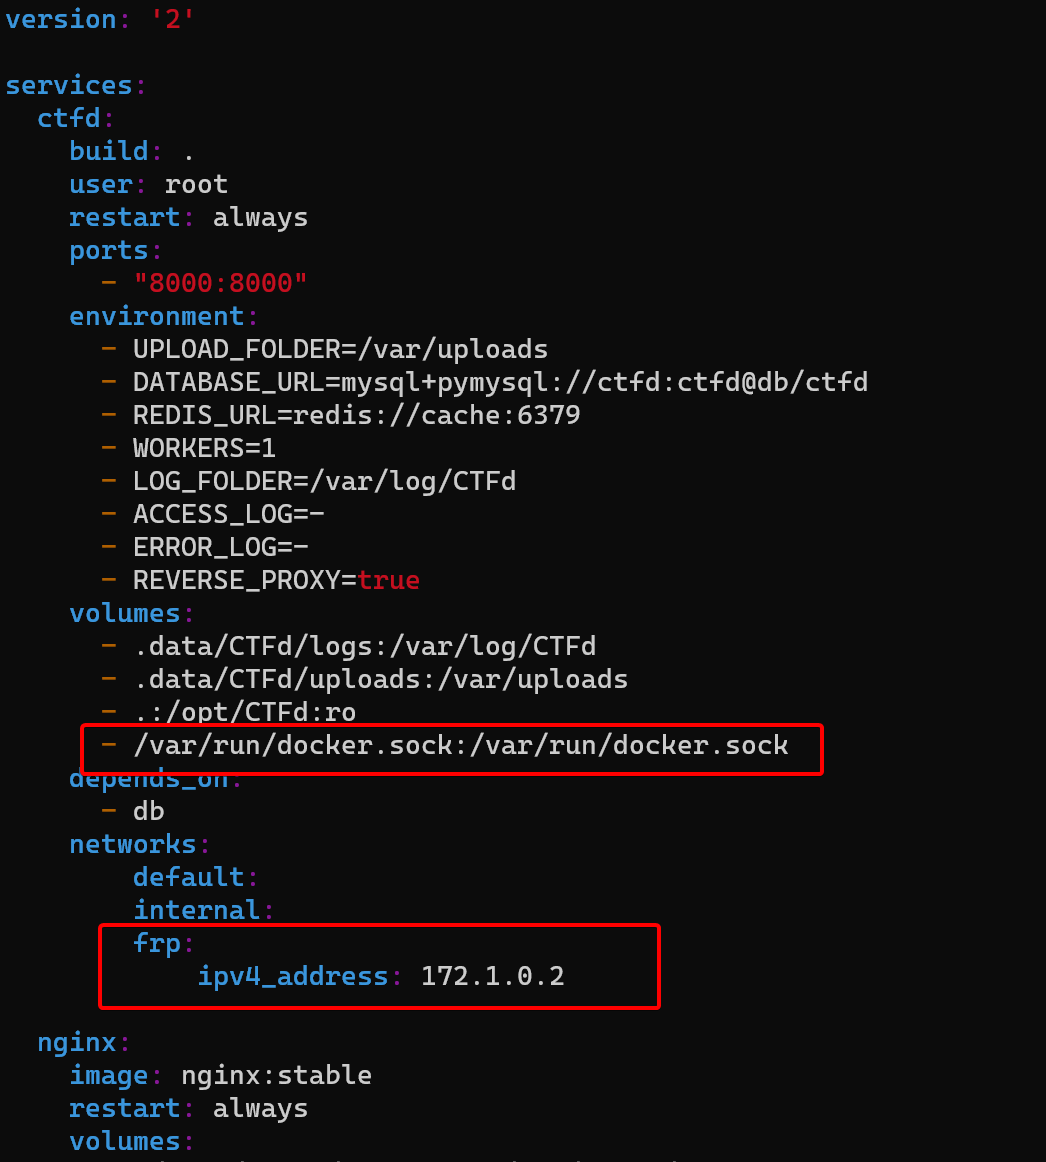
编辑docker-compose.yml
vim docker-compose.yml
在ctfd中的volumes增加:
- /var/run/docker.sock:/var/run/docker.sock
networks中增加:
frp:
            ipv4_address: 172.1.0.2
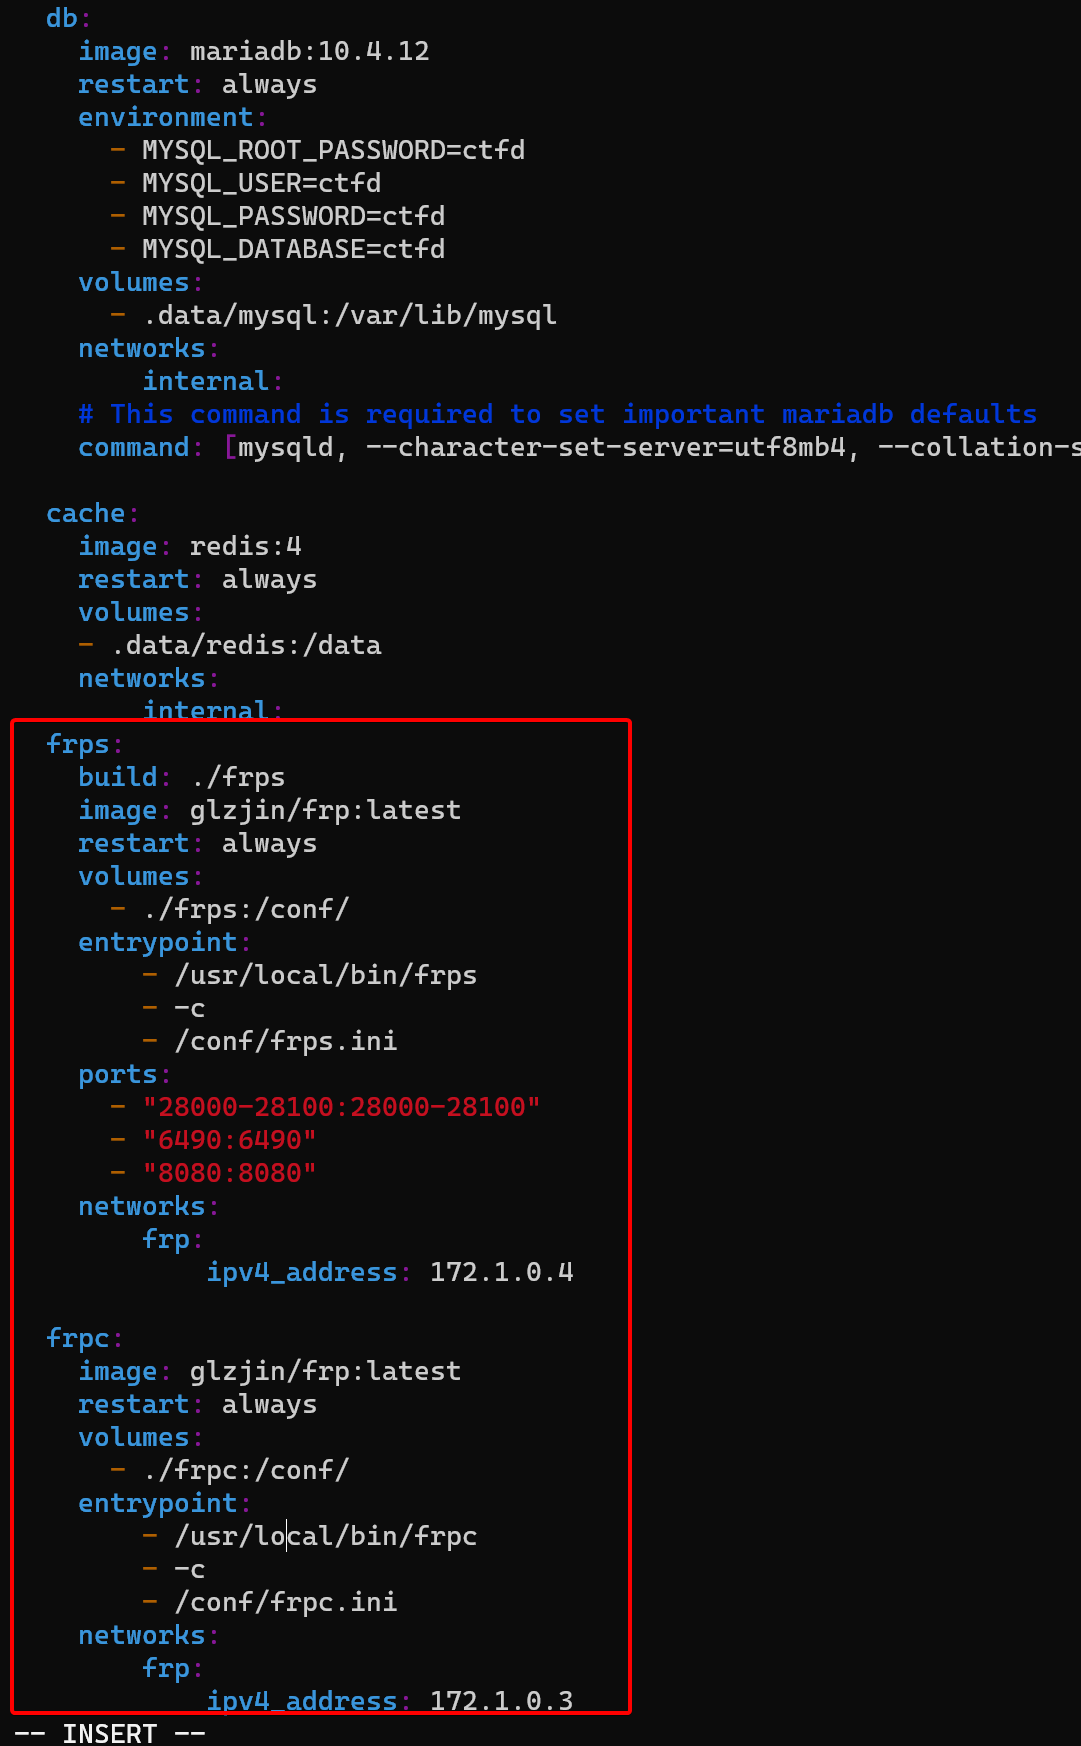
然后在文件的最下面把最后四行删掉增加以下内容:
  frps:
    build: ./frps
    image: glzjin/frp:latest
    restart: always
    volumes:
      - ./frps:/conf/
    entrypoint:
        - /usr/local/bin/frps
        - -c
        - /conf/frps.ini
    ports:
      - "28000-28100:28000-28100"
      - "6490:6490"
      - "8080:8080"
    networks:
        frp:
            ipv4_address: 172.1.0.4

  frpc:
    image: glzjin/frp:latest
    restart: always
    volumes:
      - ./frpc:/conf/
    entrypoint:
        - /usr/local/bin/frpc
        - -c
        - /conf/frpc.ini
    networks:
        frp:
            ipv4_address: 172.1.0.3
        frp-containers:

networks:
    default:
    internal:
        internal: true
    frp:
        driver: bridge
        ipam:
            config:
                - subnet: 172.1.0.0/16
    frp-containers:
        driver: overlay
        attachable: true
        internal: true
        ipam:
            config:
                - subnet: 172.2.0.0/16
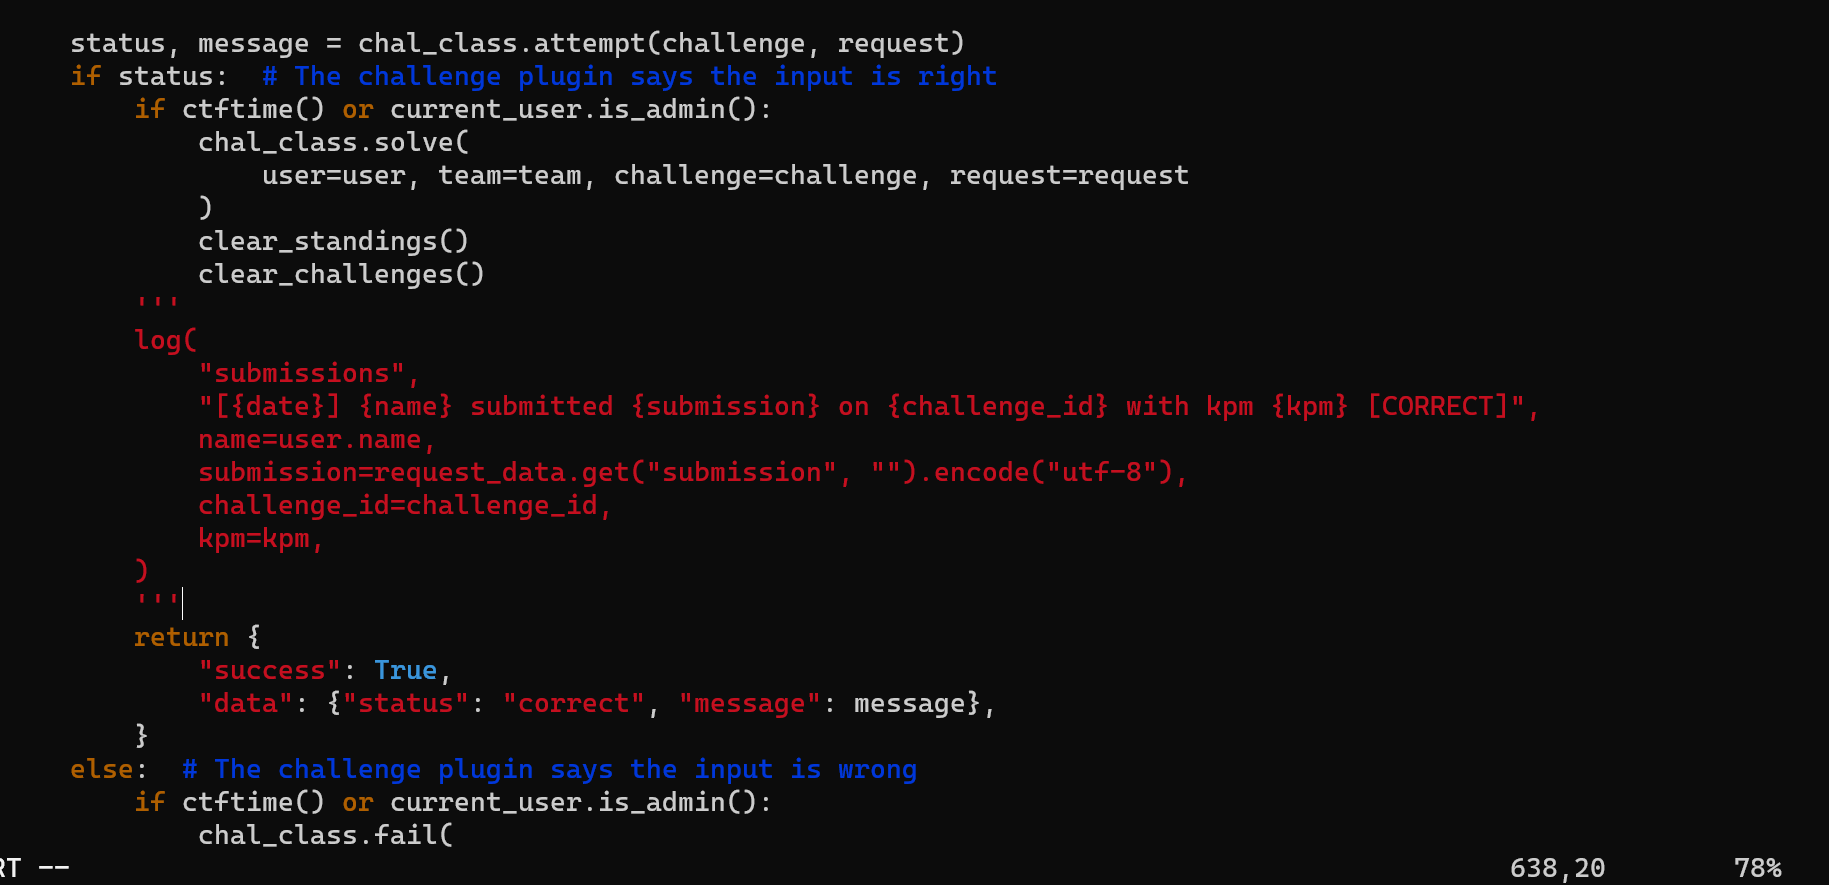
修复提交flag无响应的问题
vim /root/CTFd/CTFd/api/v1/challenges.py
注释掉下图位置的内容
方法二:便捷安装
cd /root
git clone https://github.com/d3N00t/ctfd_ctfd_whale_frp.git CTFd
cd /root/CTFd/CTFd/plugins/
git clone https://github.com/d3N00t/ctfd-whale.git ctfd-whale
rm -rf dynamic_challenges
git clone https://github.com/d3N00t/ctfd_dynamic_challenges.git dynamic_challenges
cd /root/CTFd/CTFd/themes/
git clone https://github.com/0xdevsachin/CTFD-crimson-theme.git
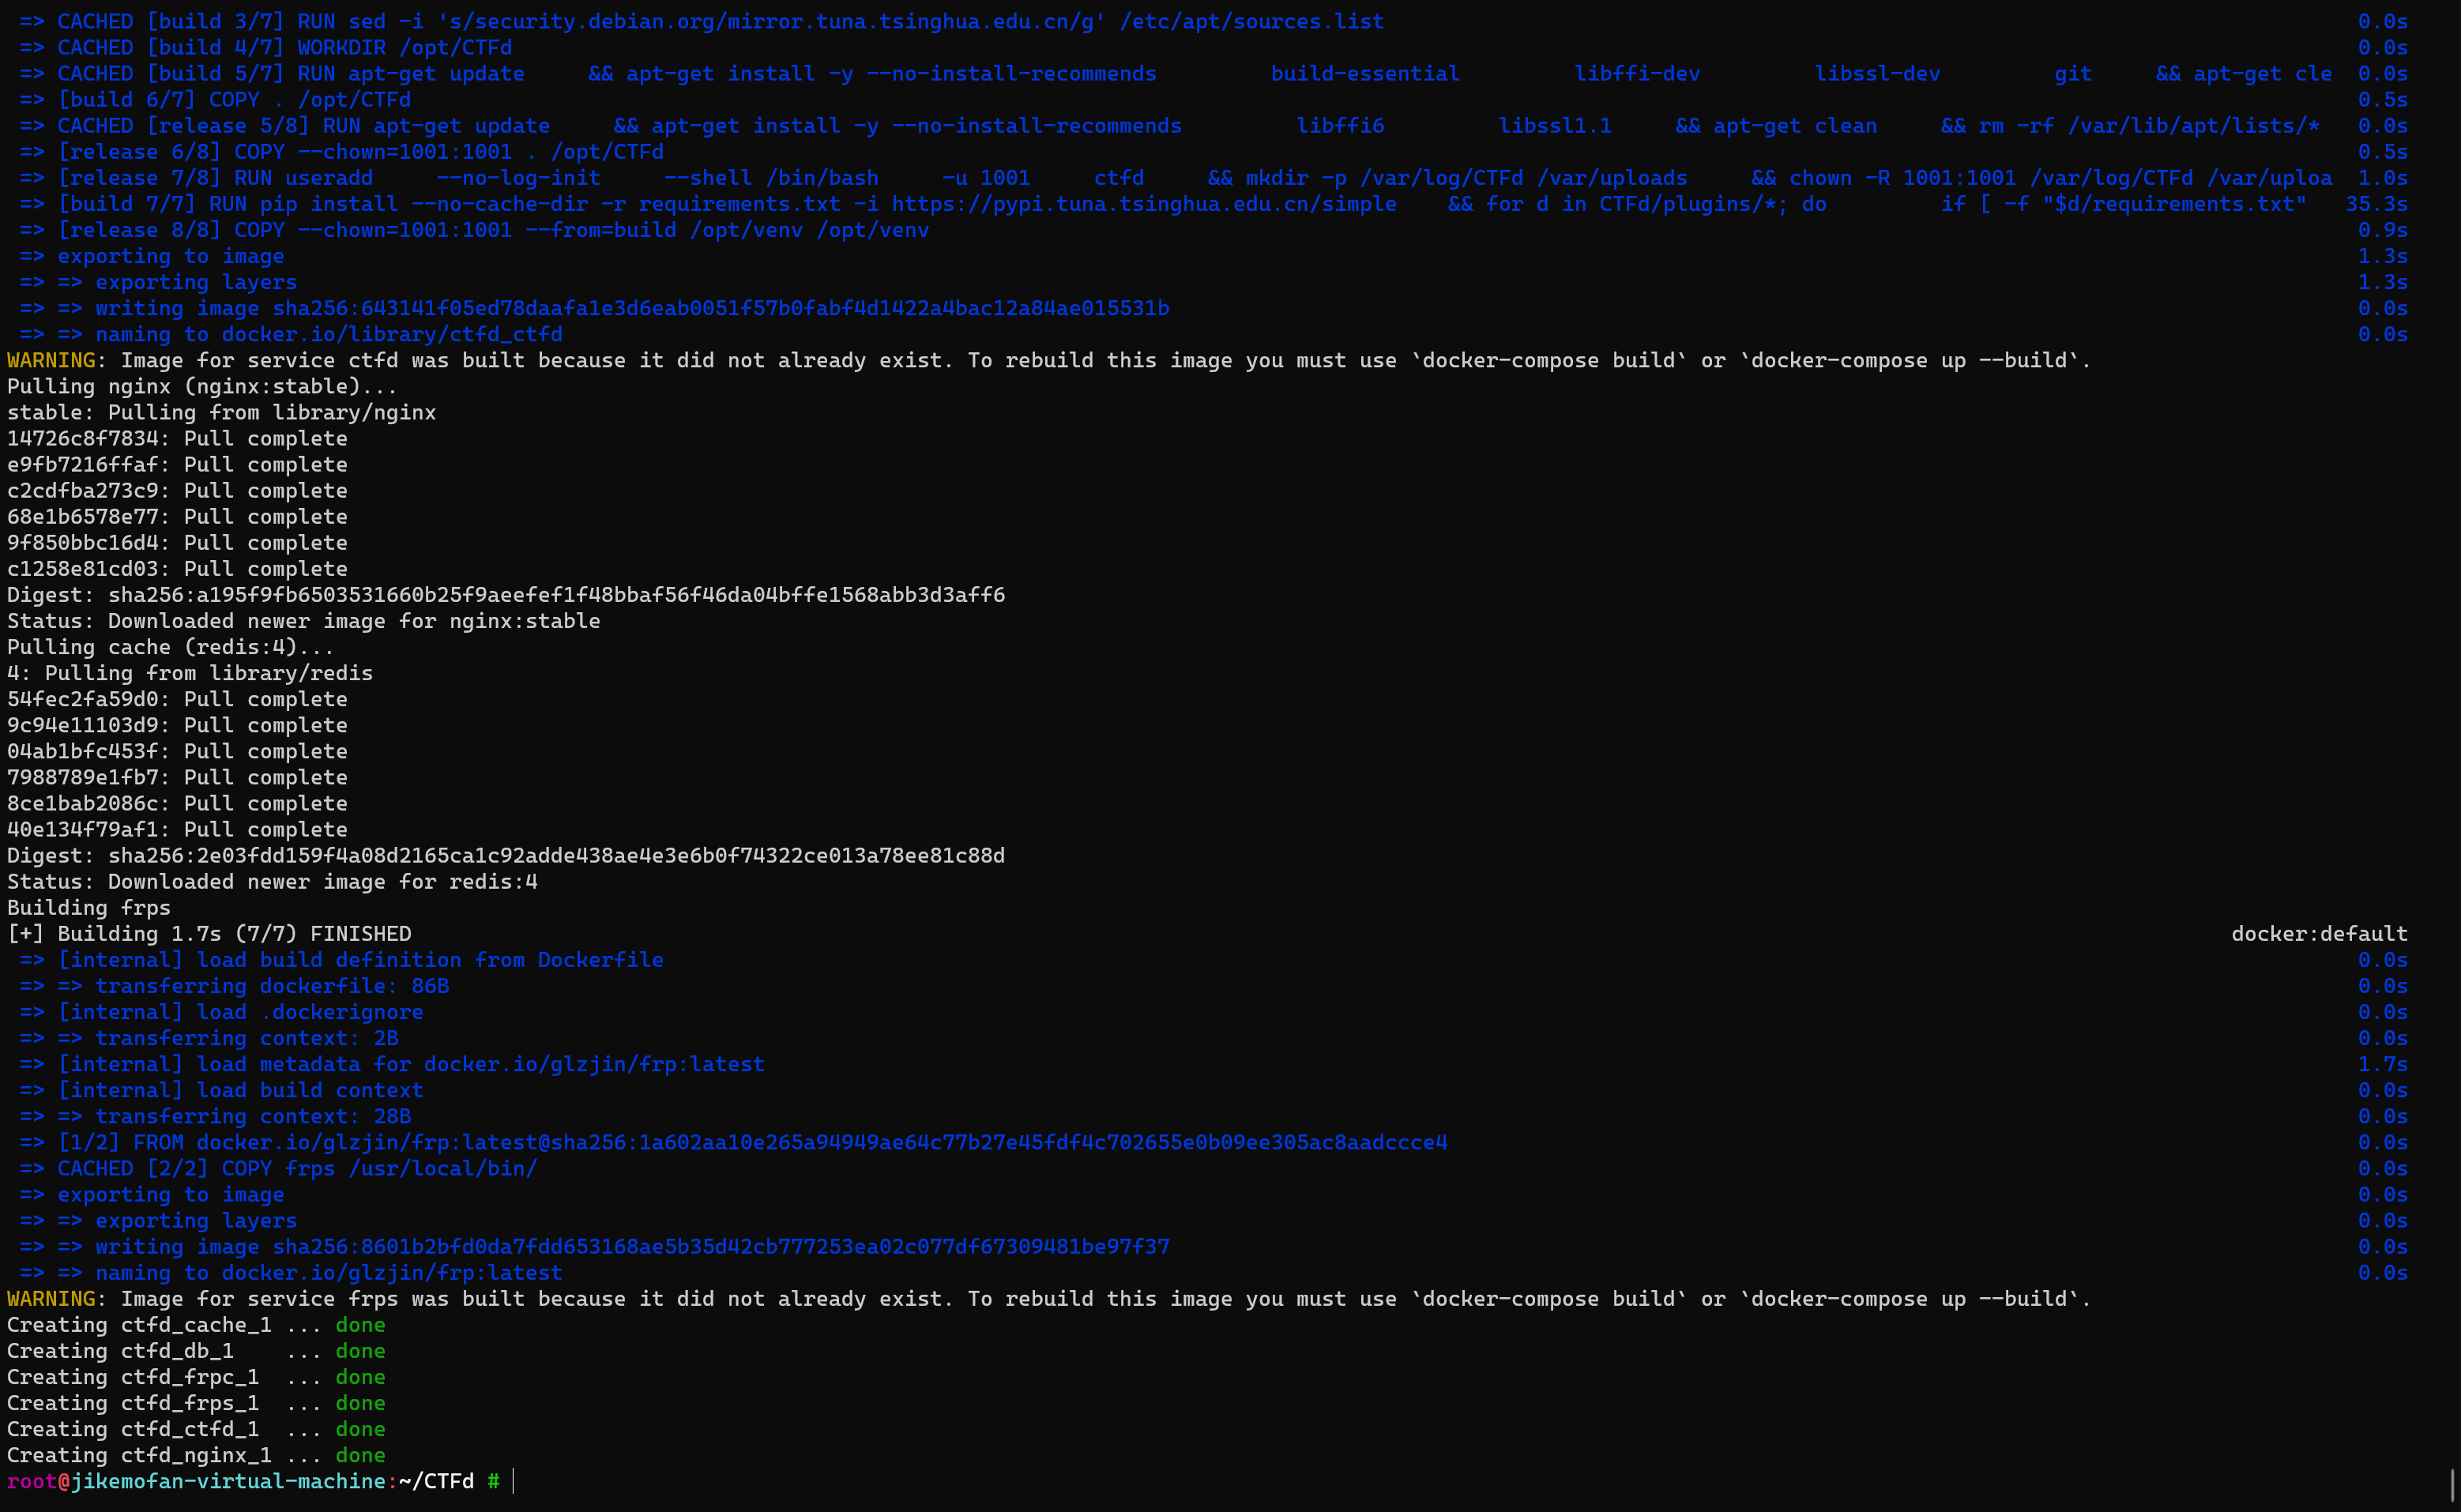
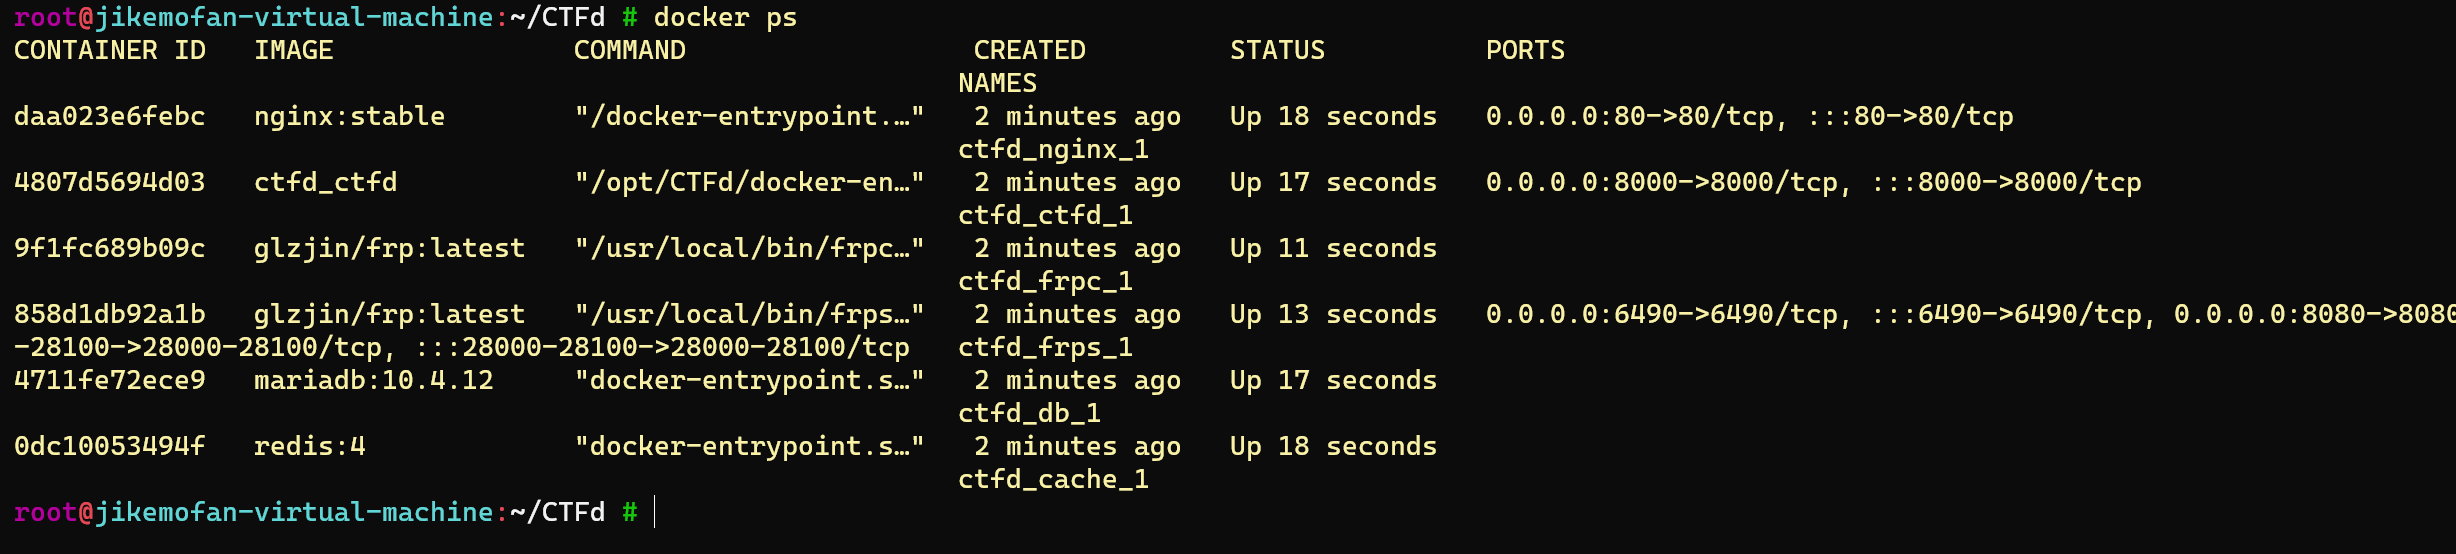
CTFd启动
cd /root/CTFd
docker-compose up -d

配置CTFd
访问http://ip:8000
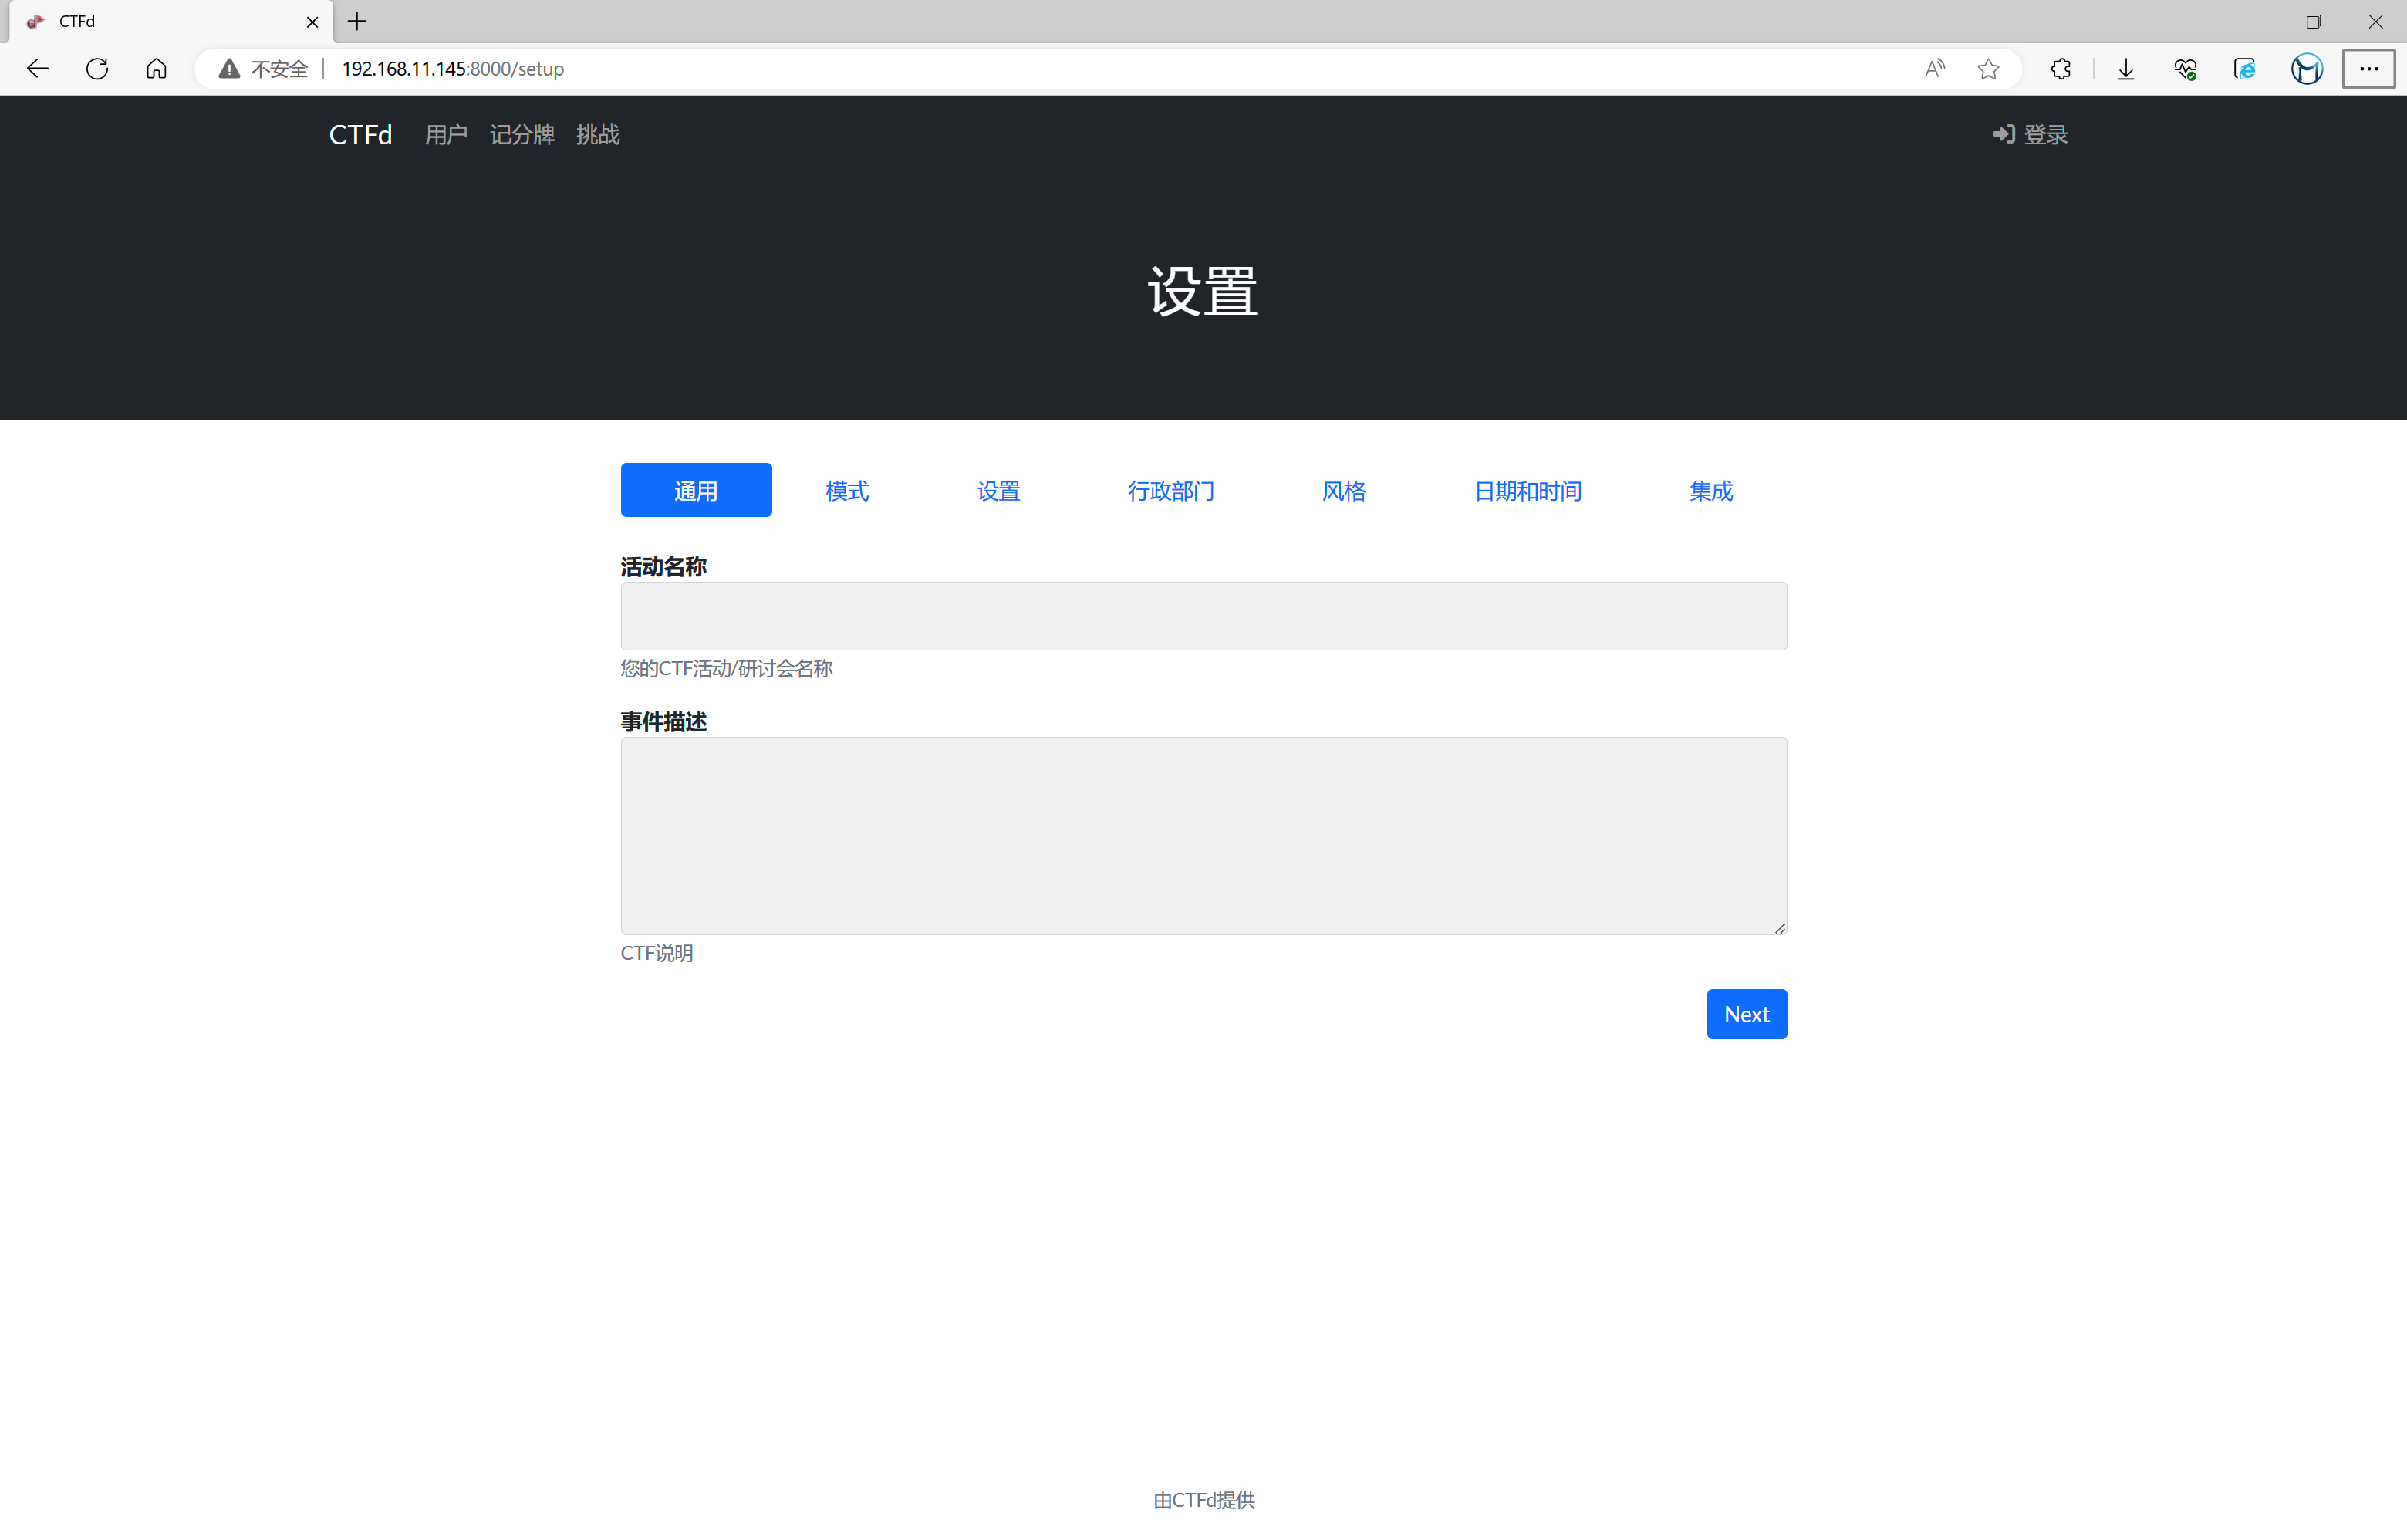 自己根据需要配置一下就行了。
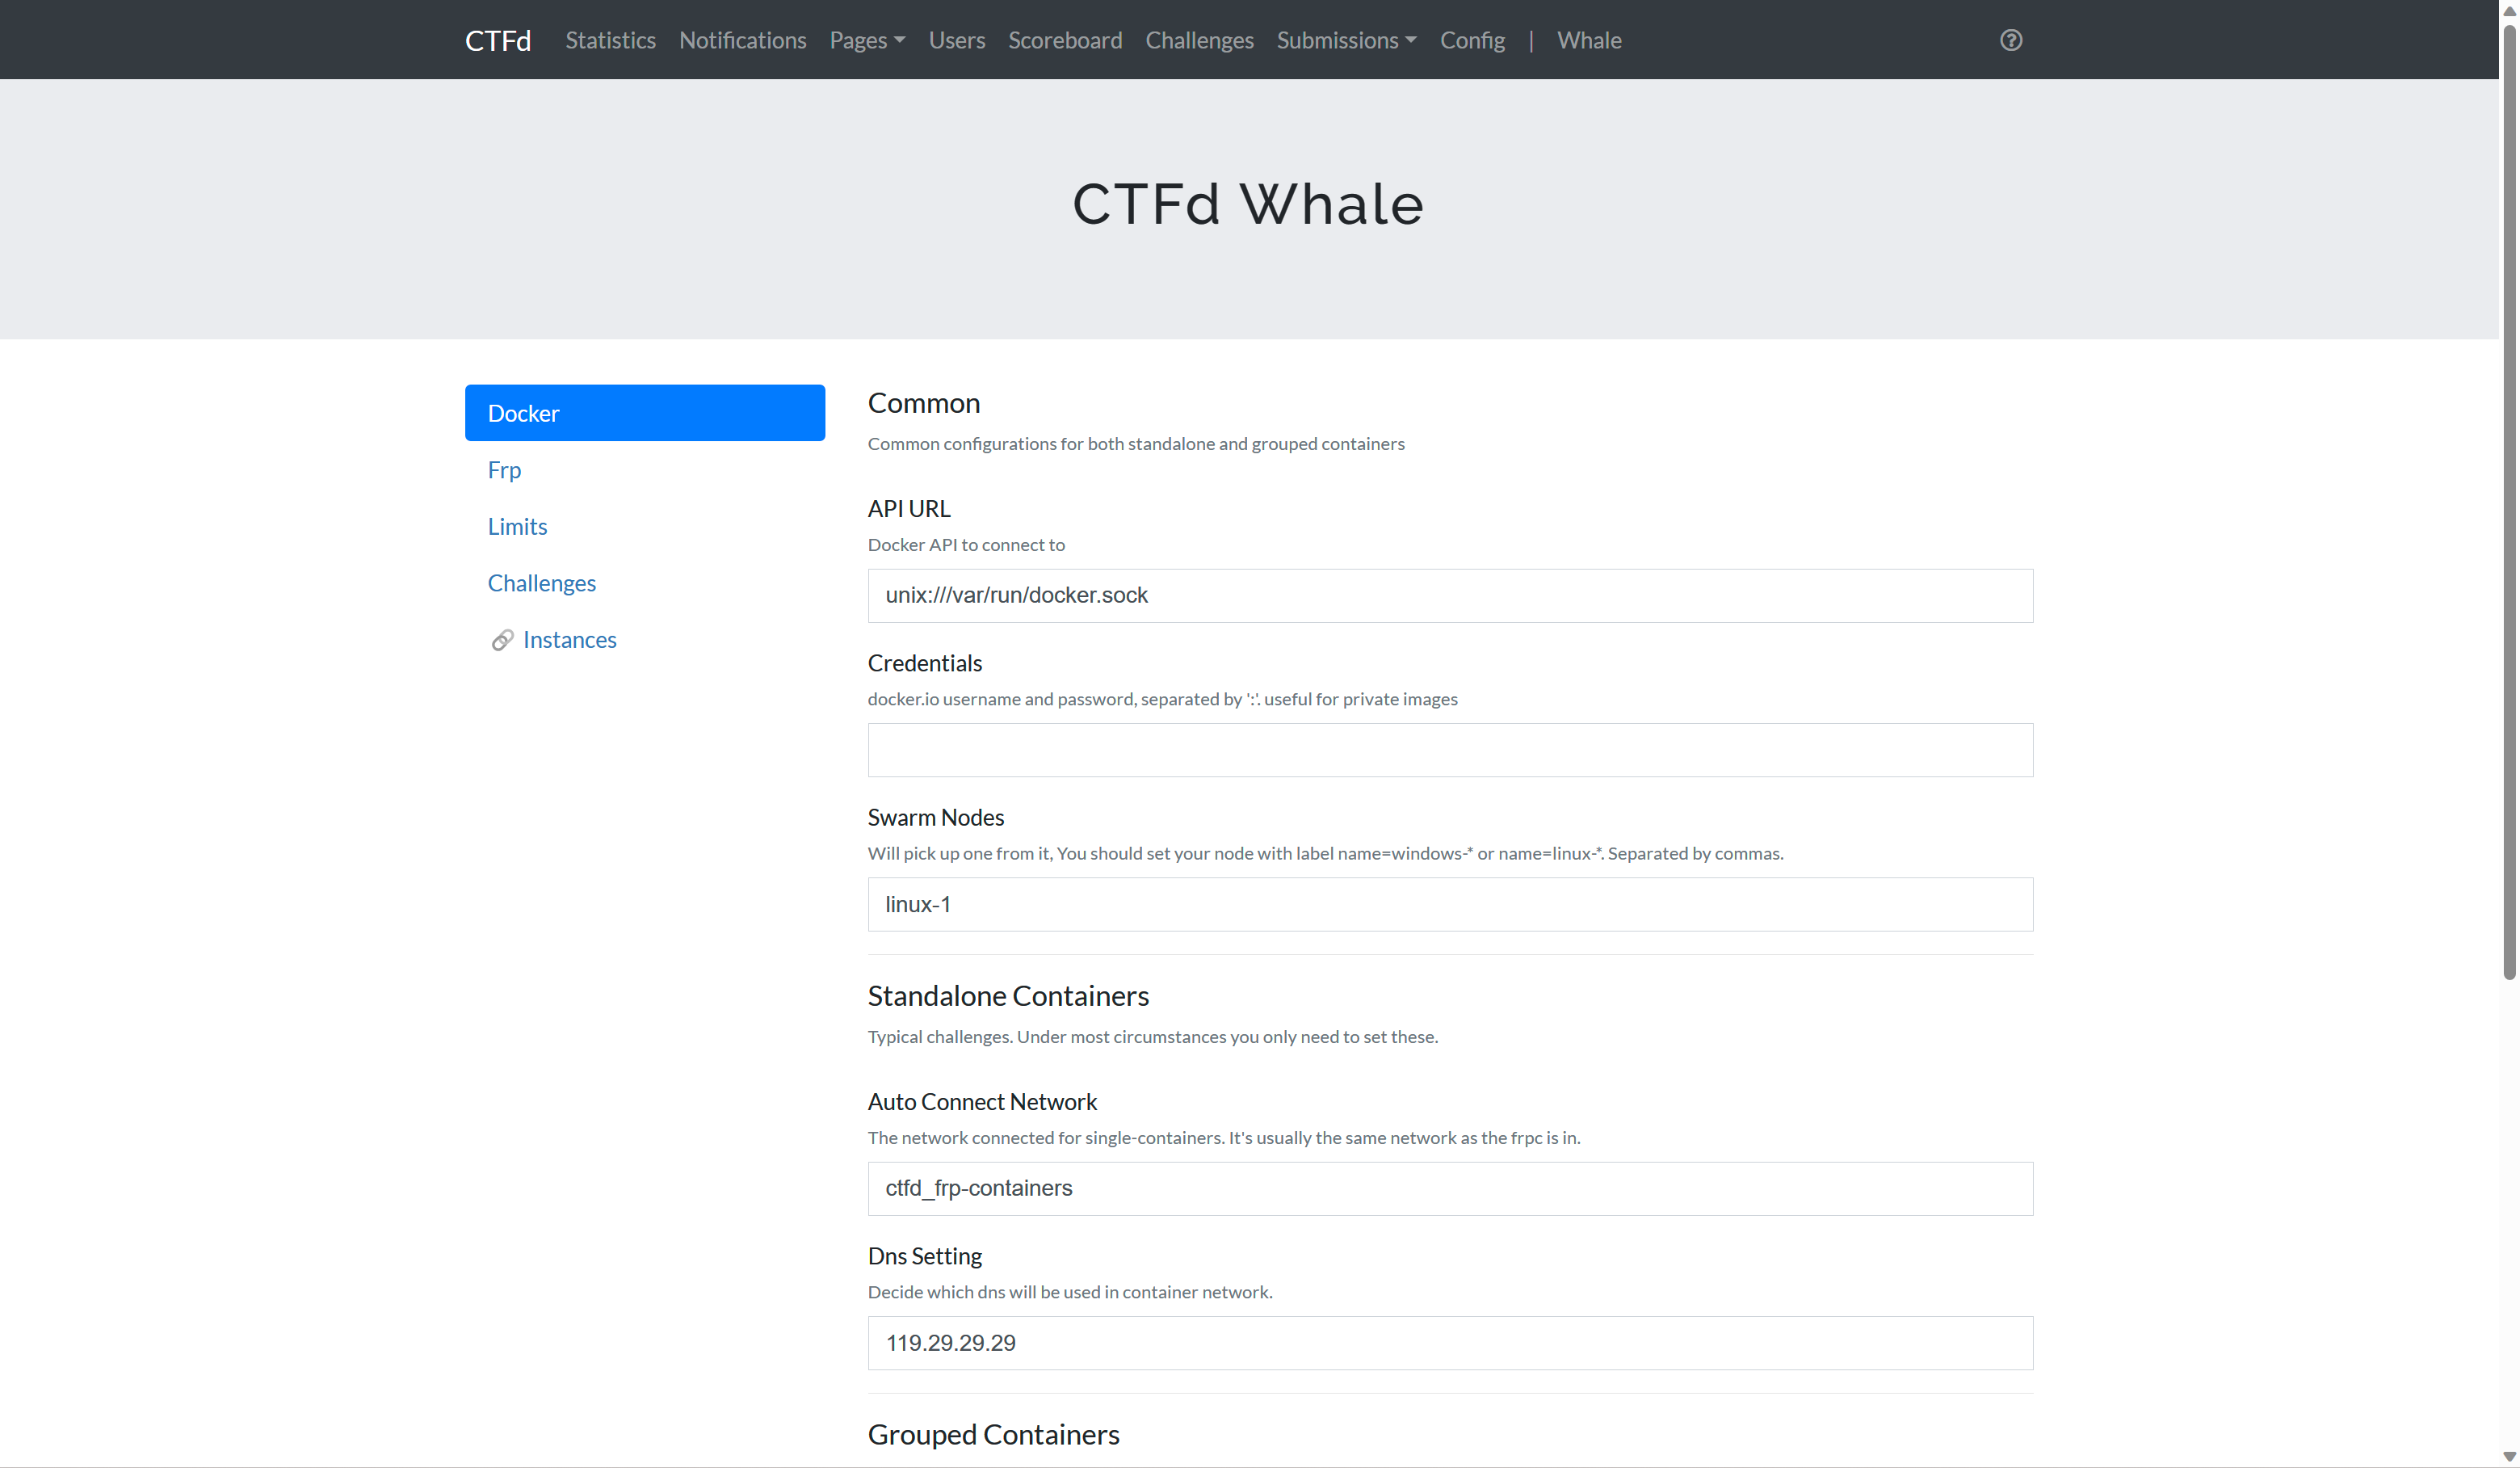
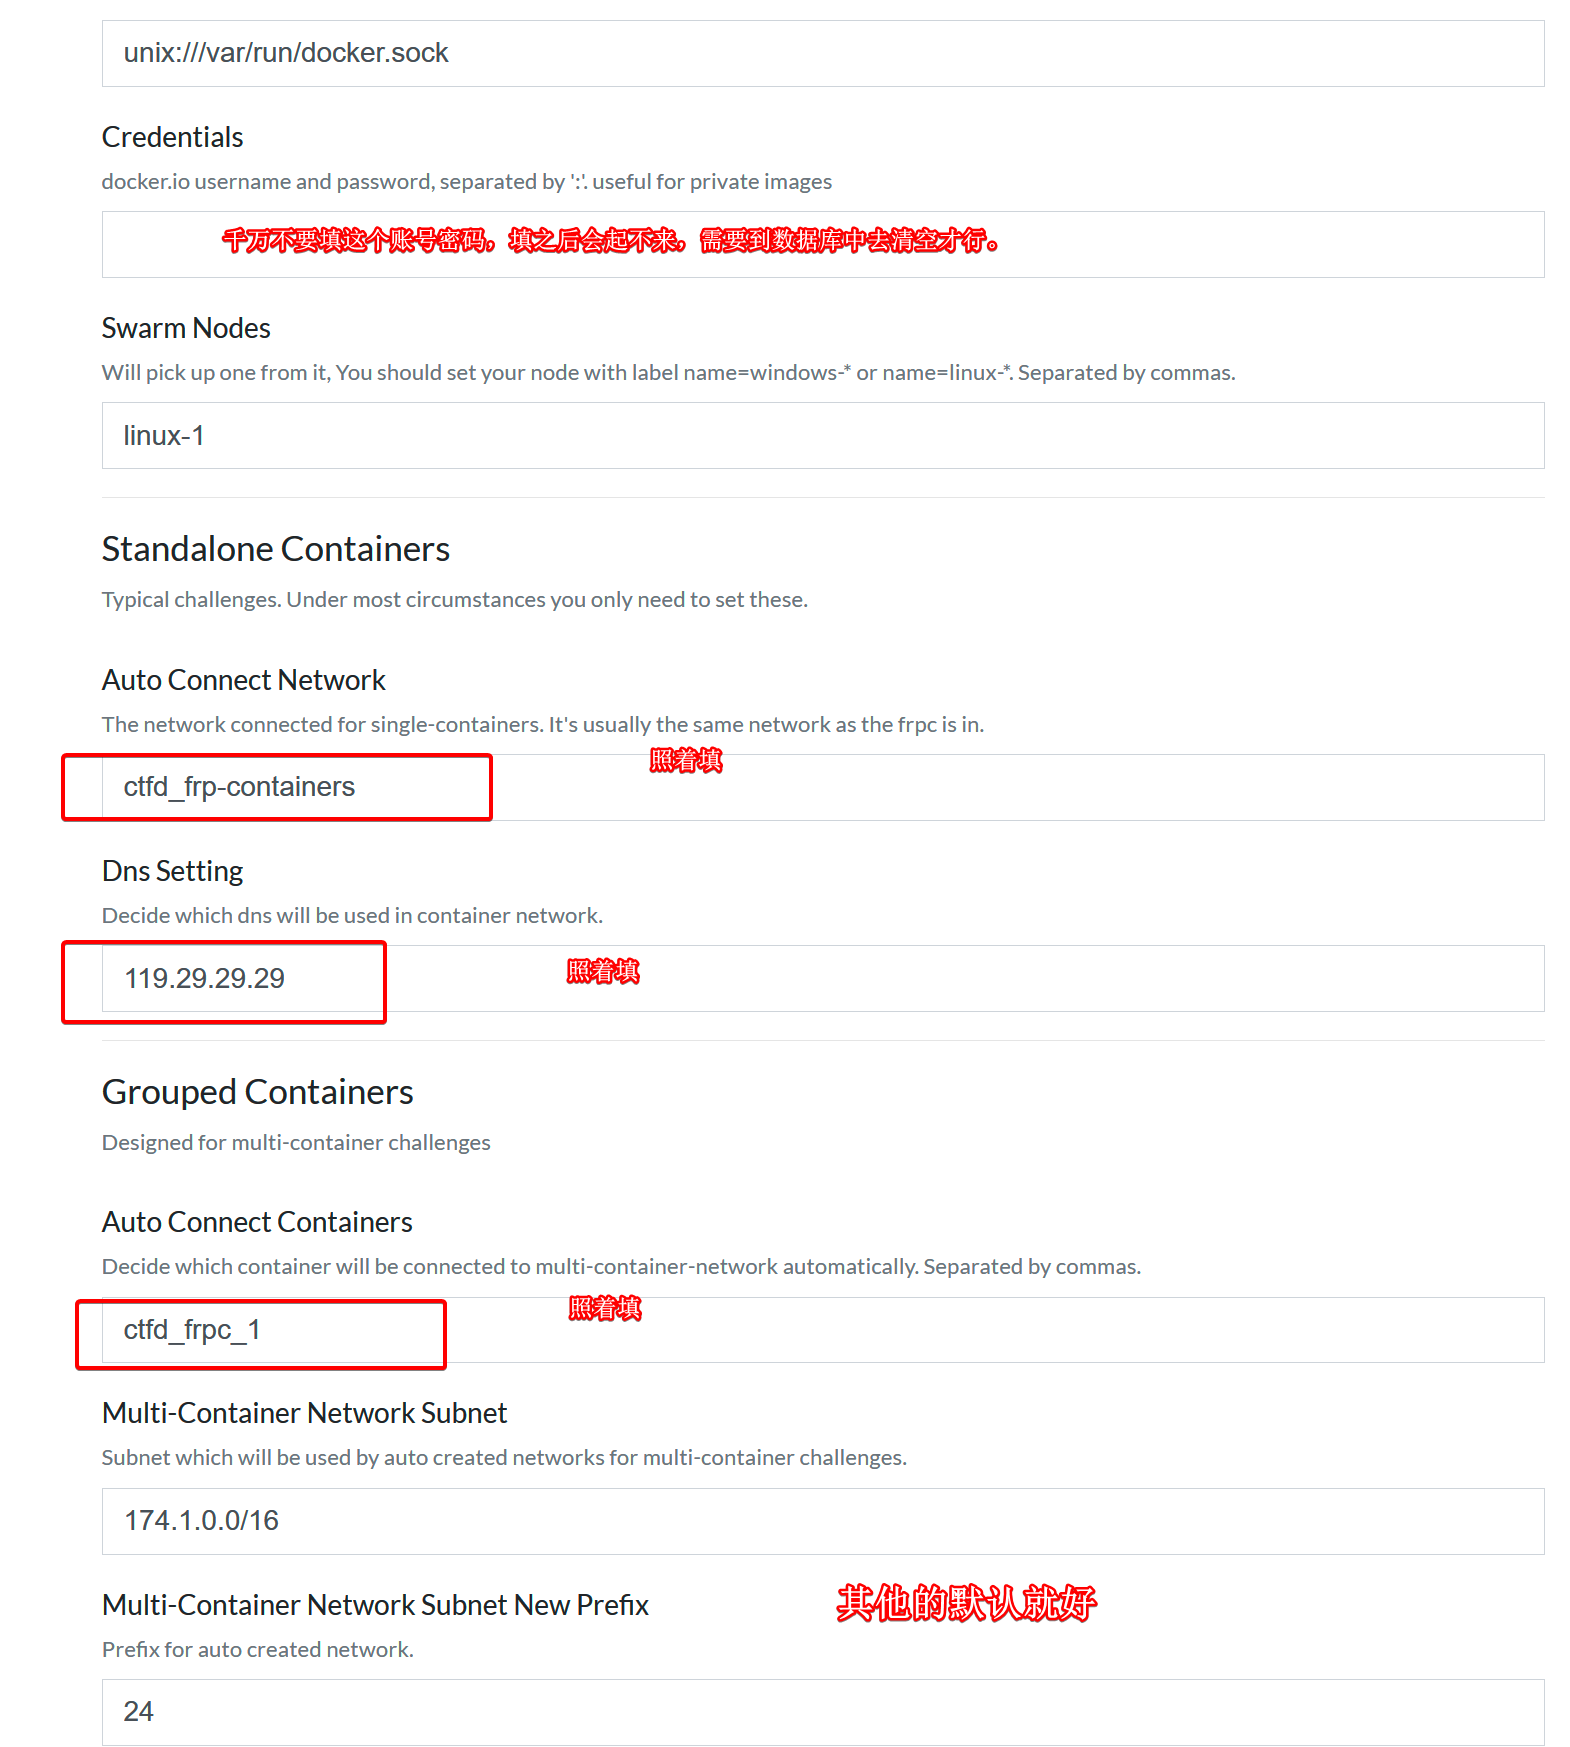
到后台面板打开这个Whale页面
自己根据需要配置一下就行了。
到后台面板打开这个Whale页面
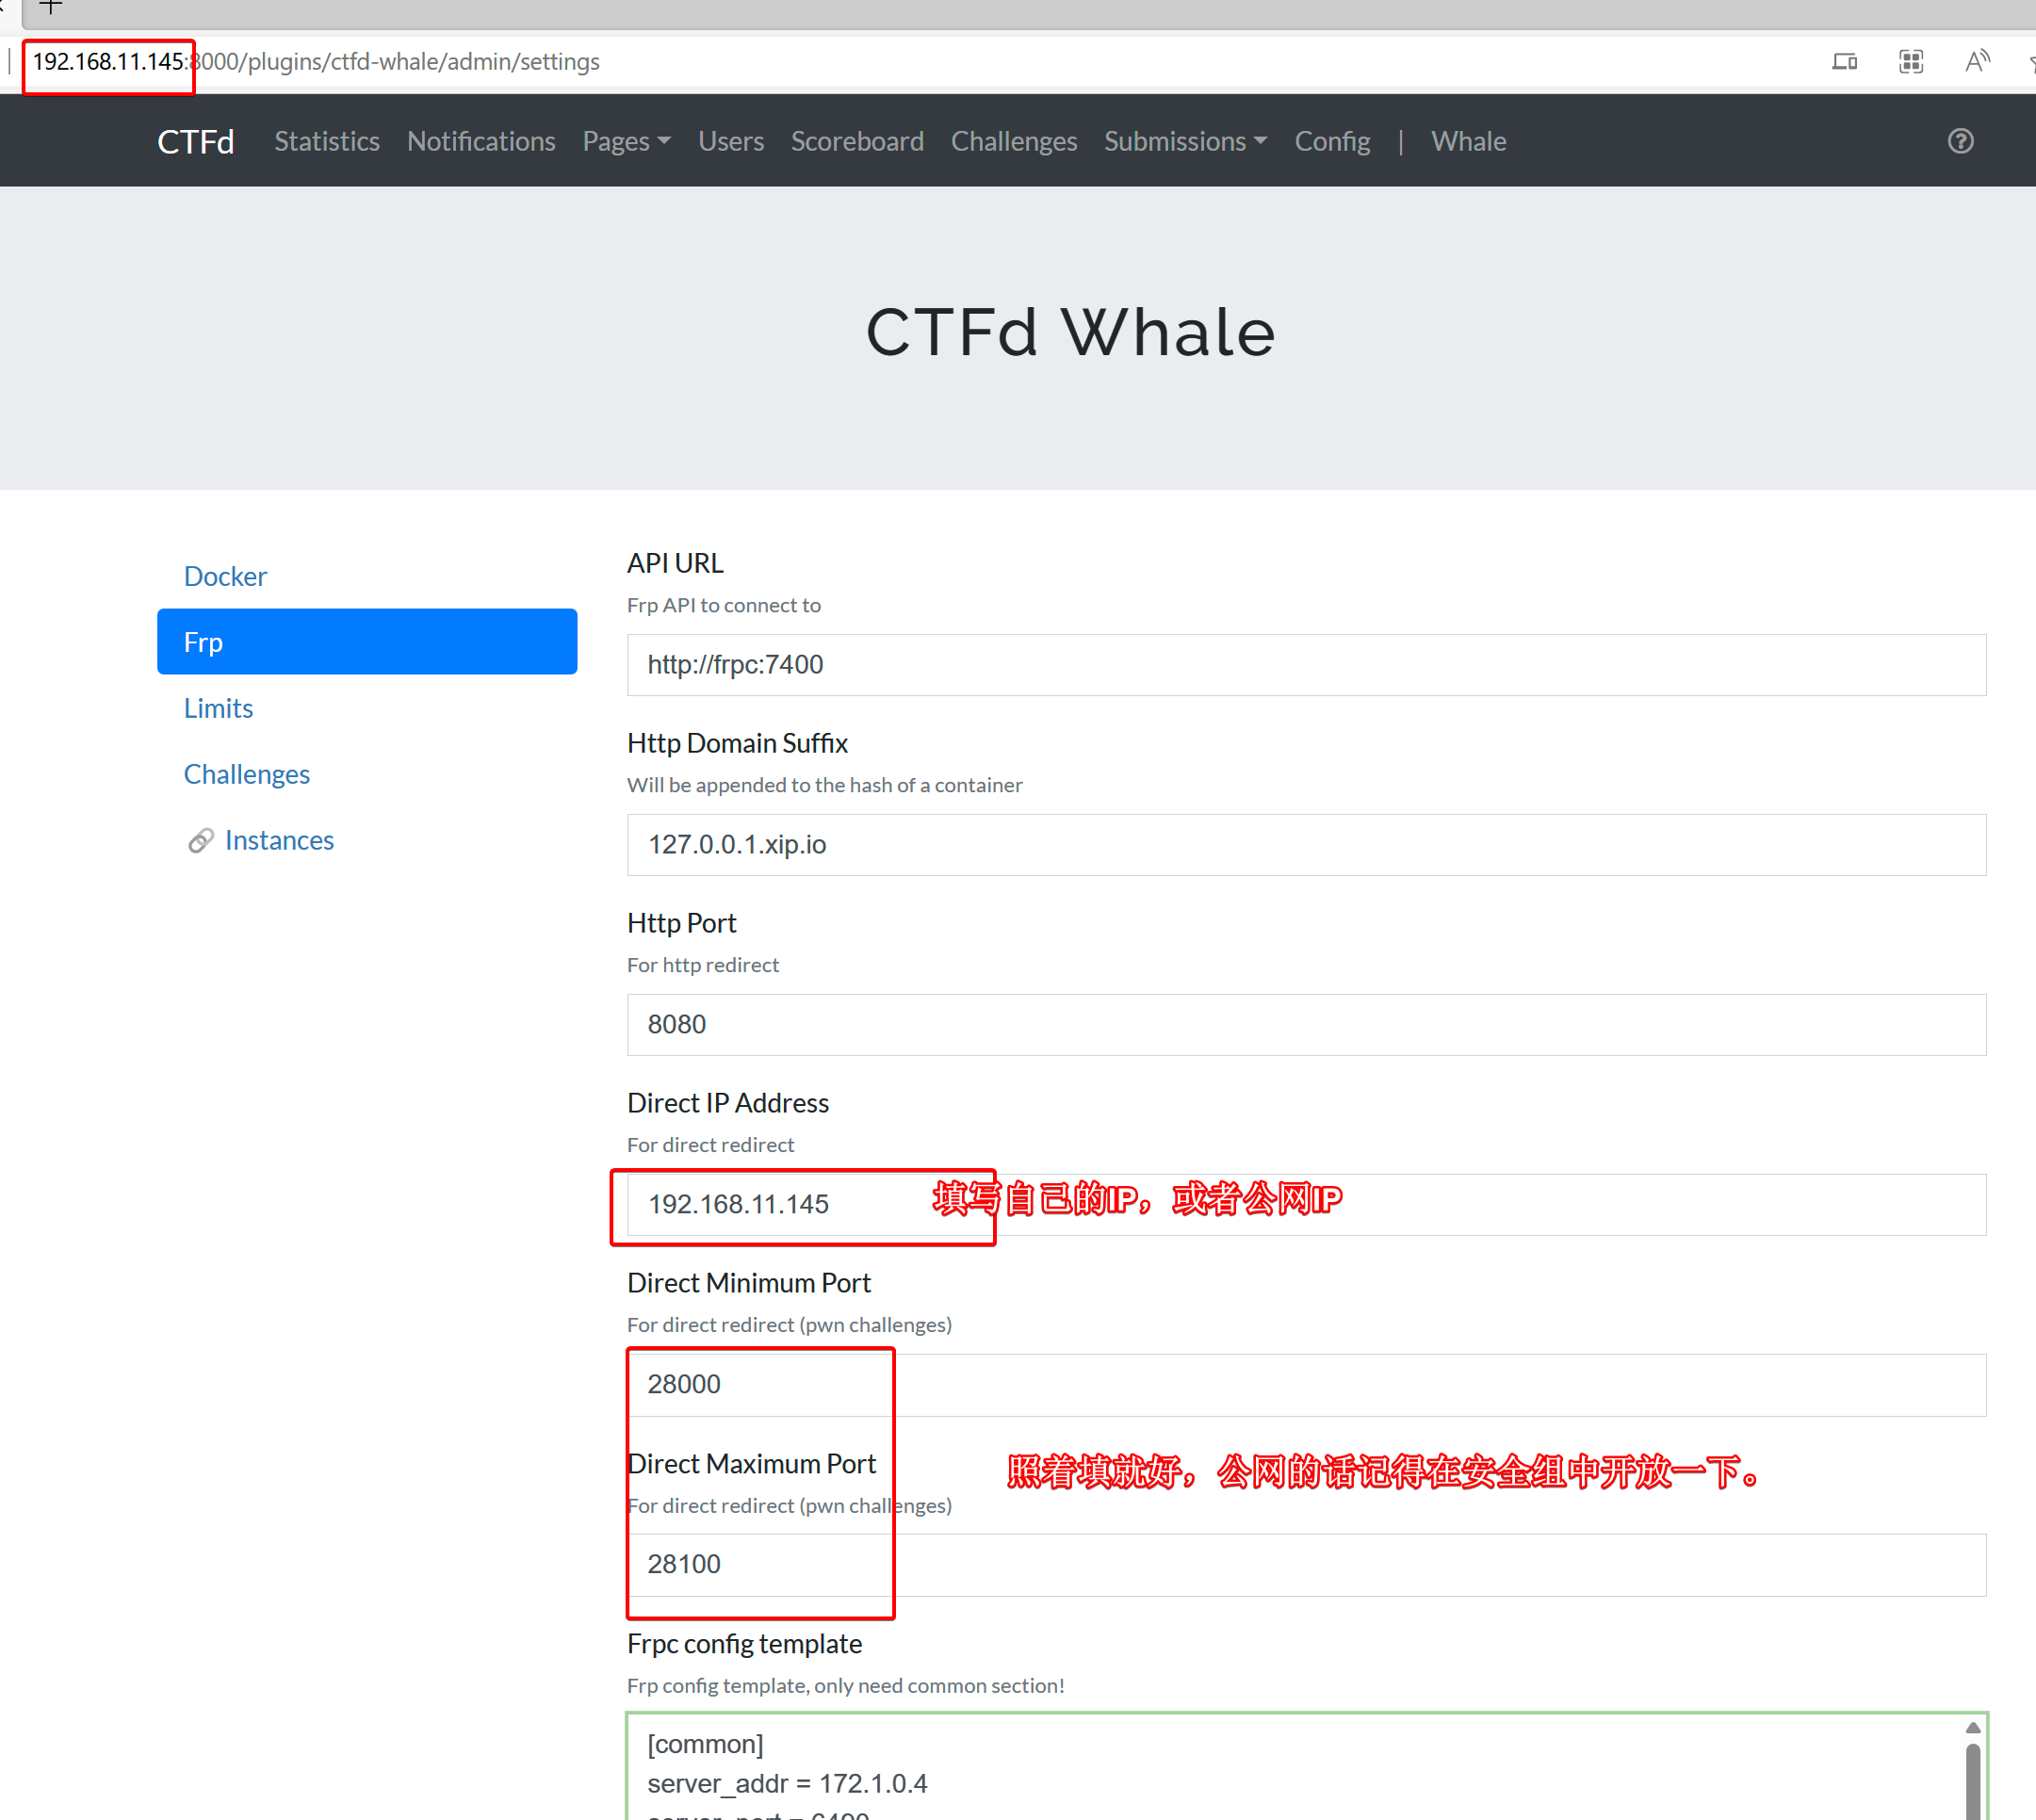 如果需要域名把下面这个写到Frpc config template的最下面即可
[ctfd]
type = http
local_ip = 172.1.0.2
local_port = 8000
use_encryption = true
use_compression = true
custom_domains = jayctf.com
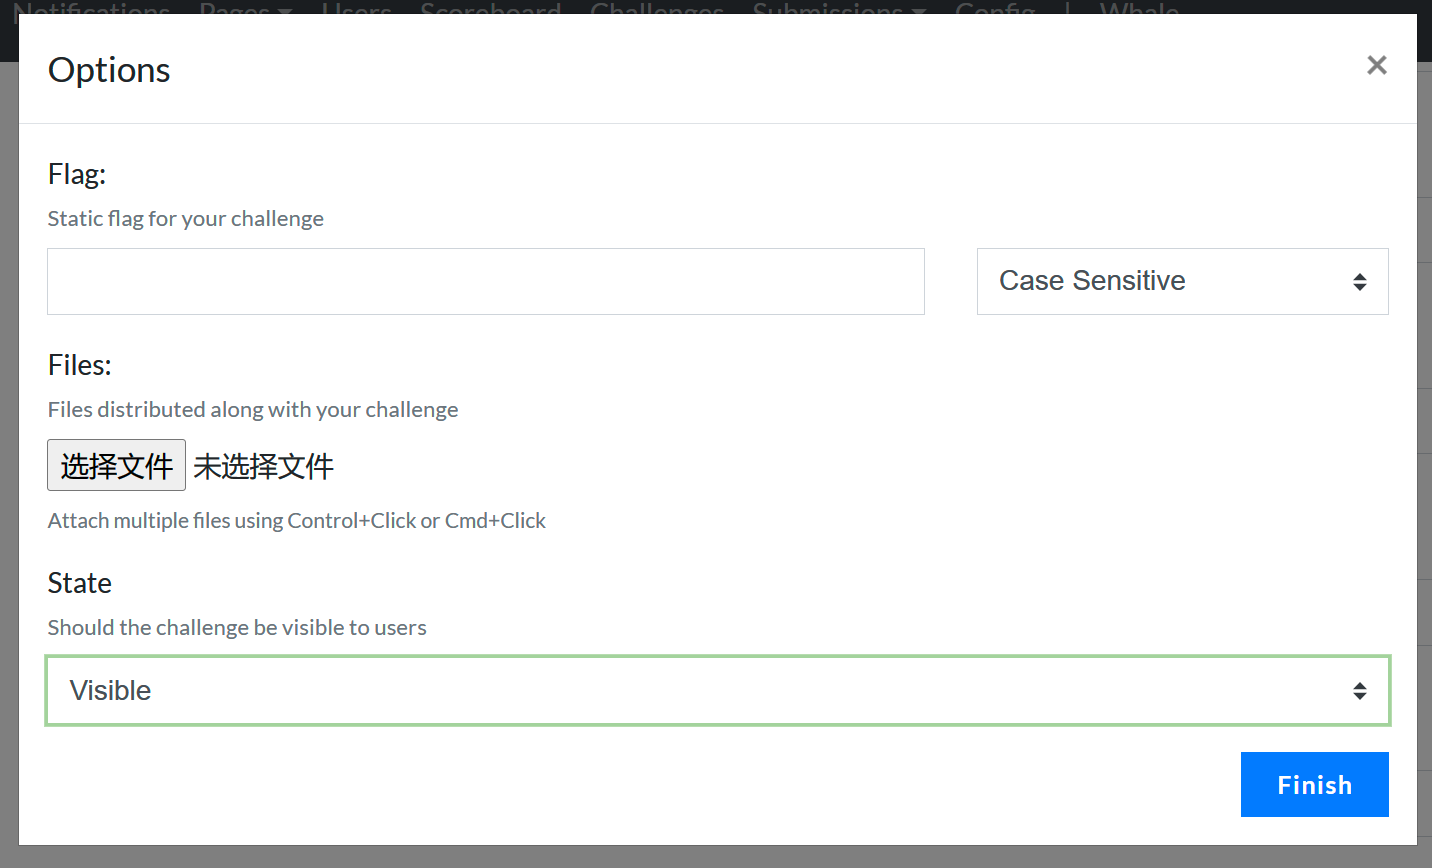
创建一个题目测试一下
ctftraining/swpuctf_2016_web_web7
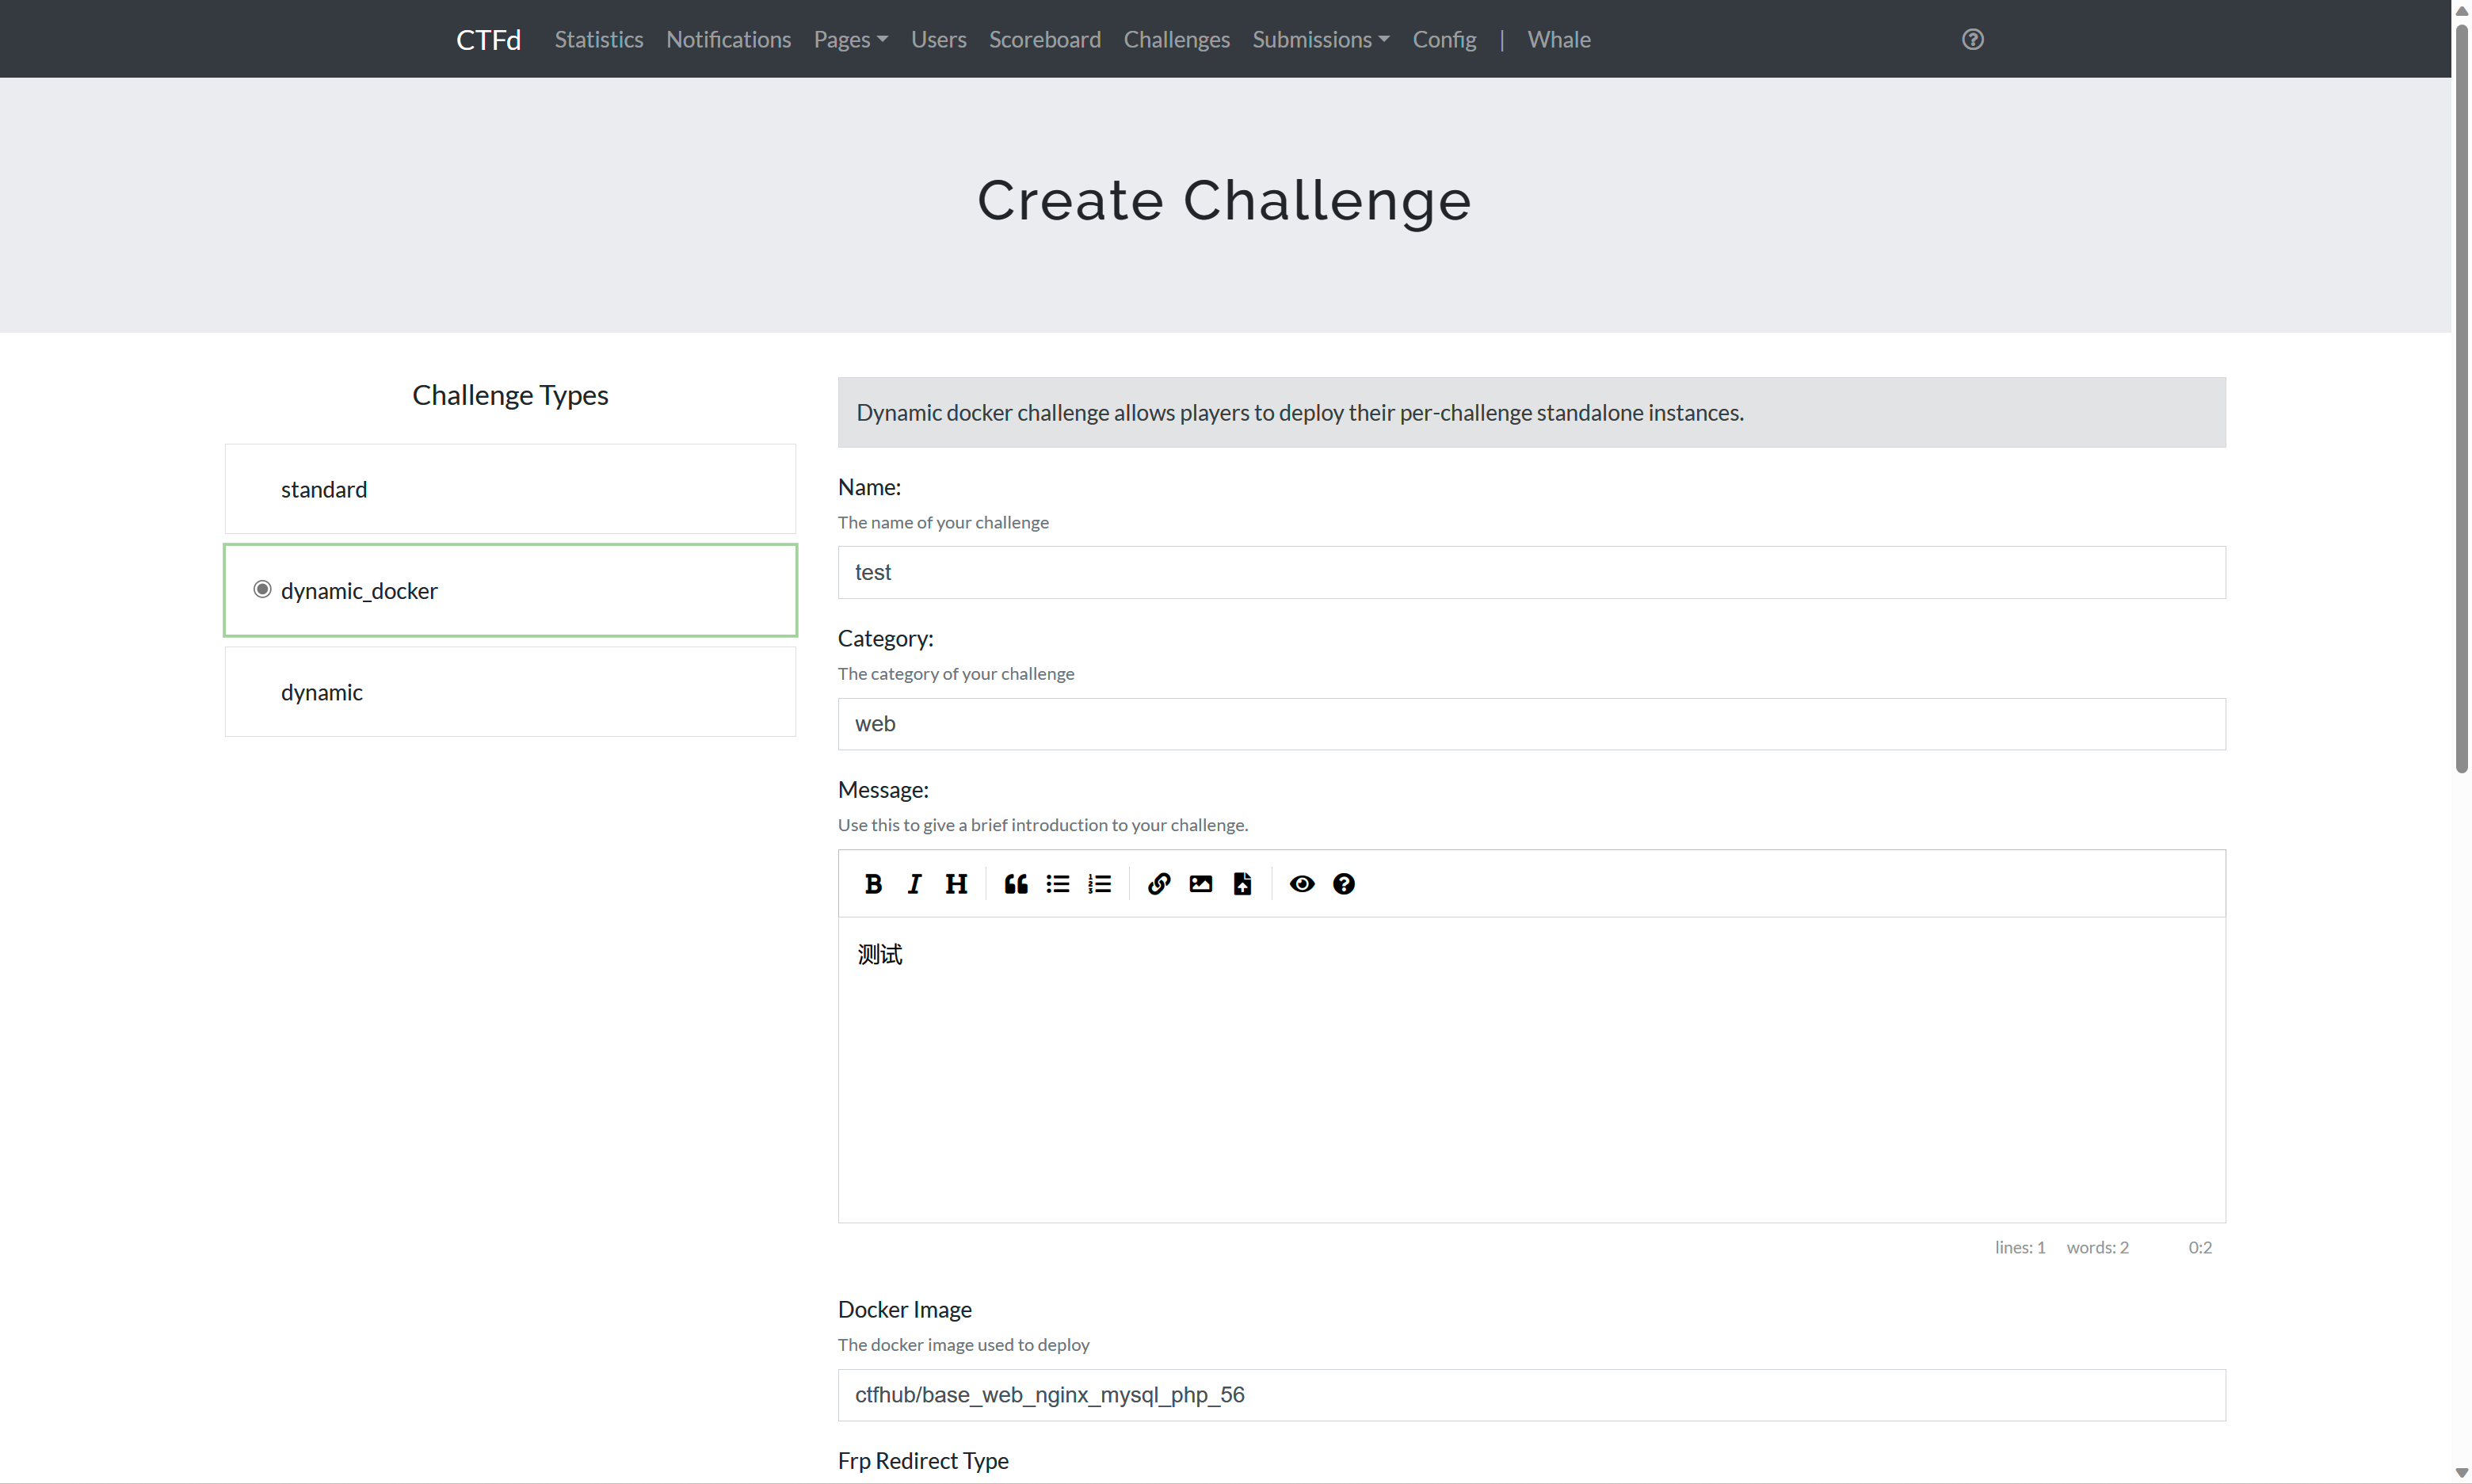
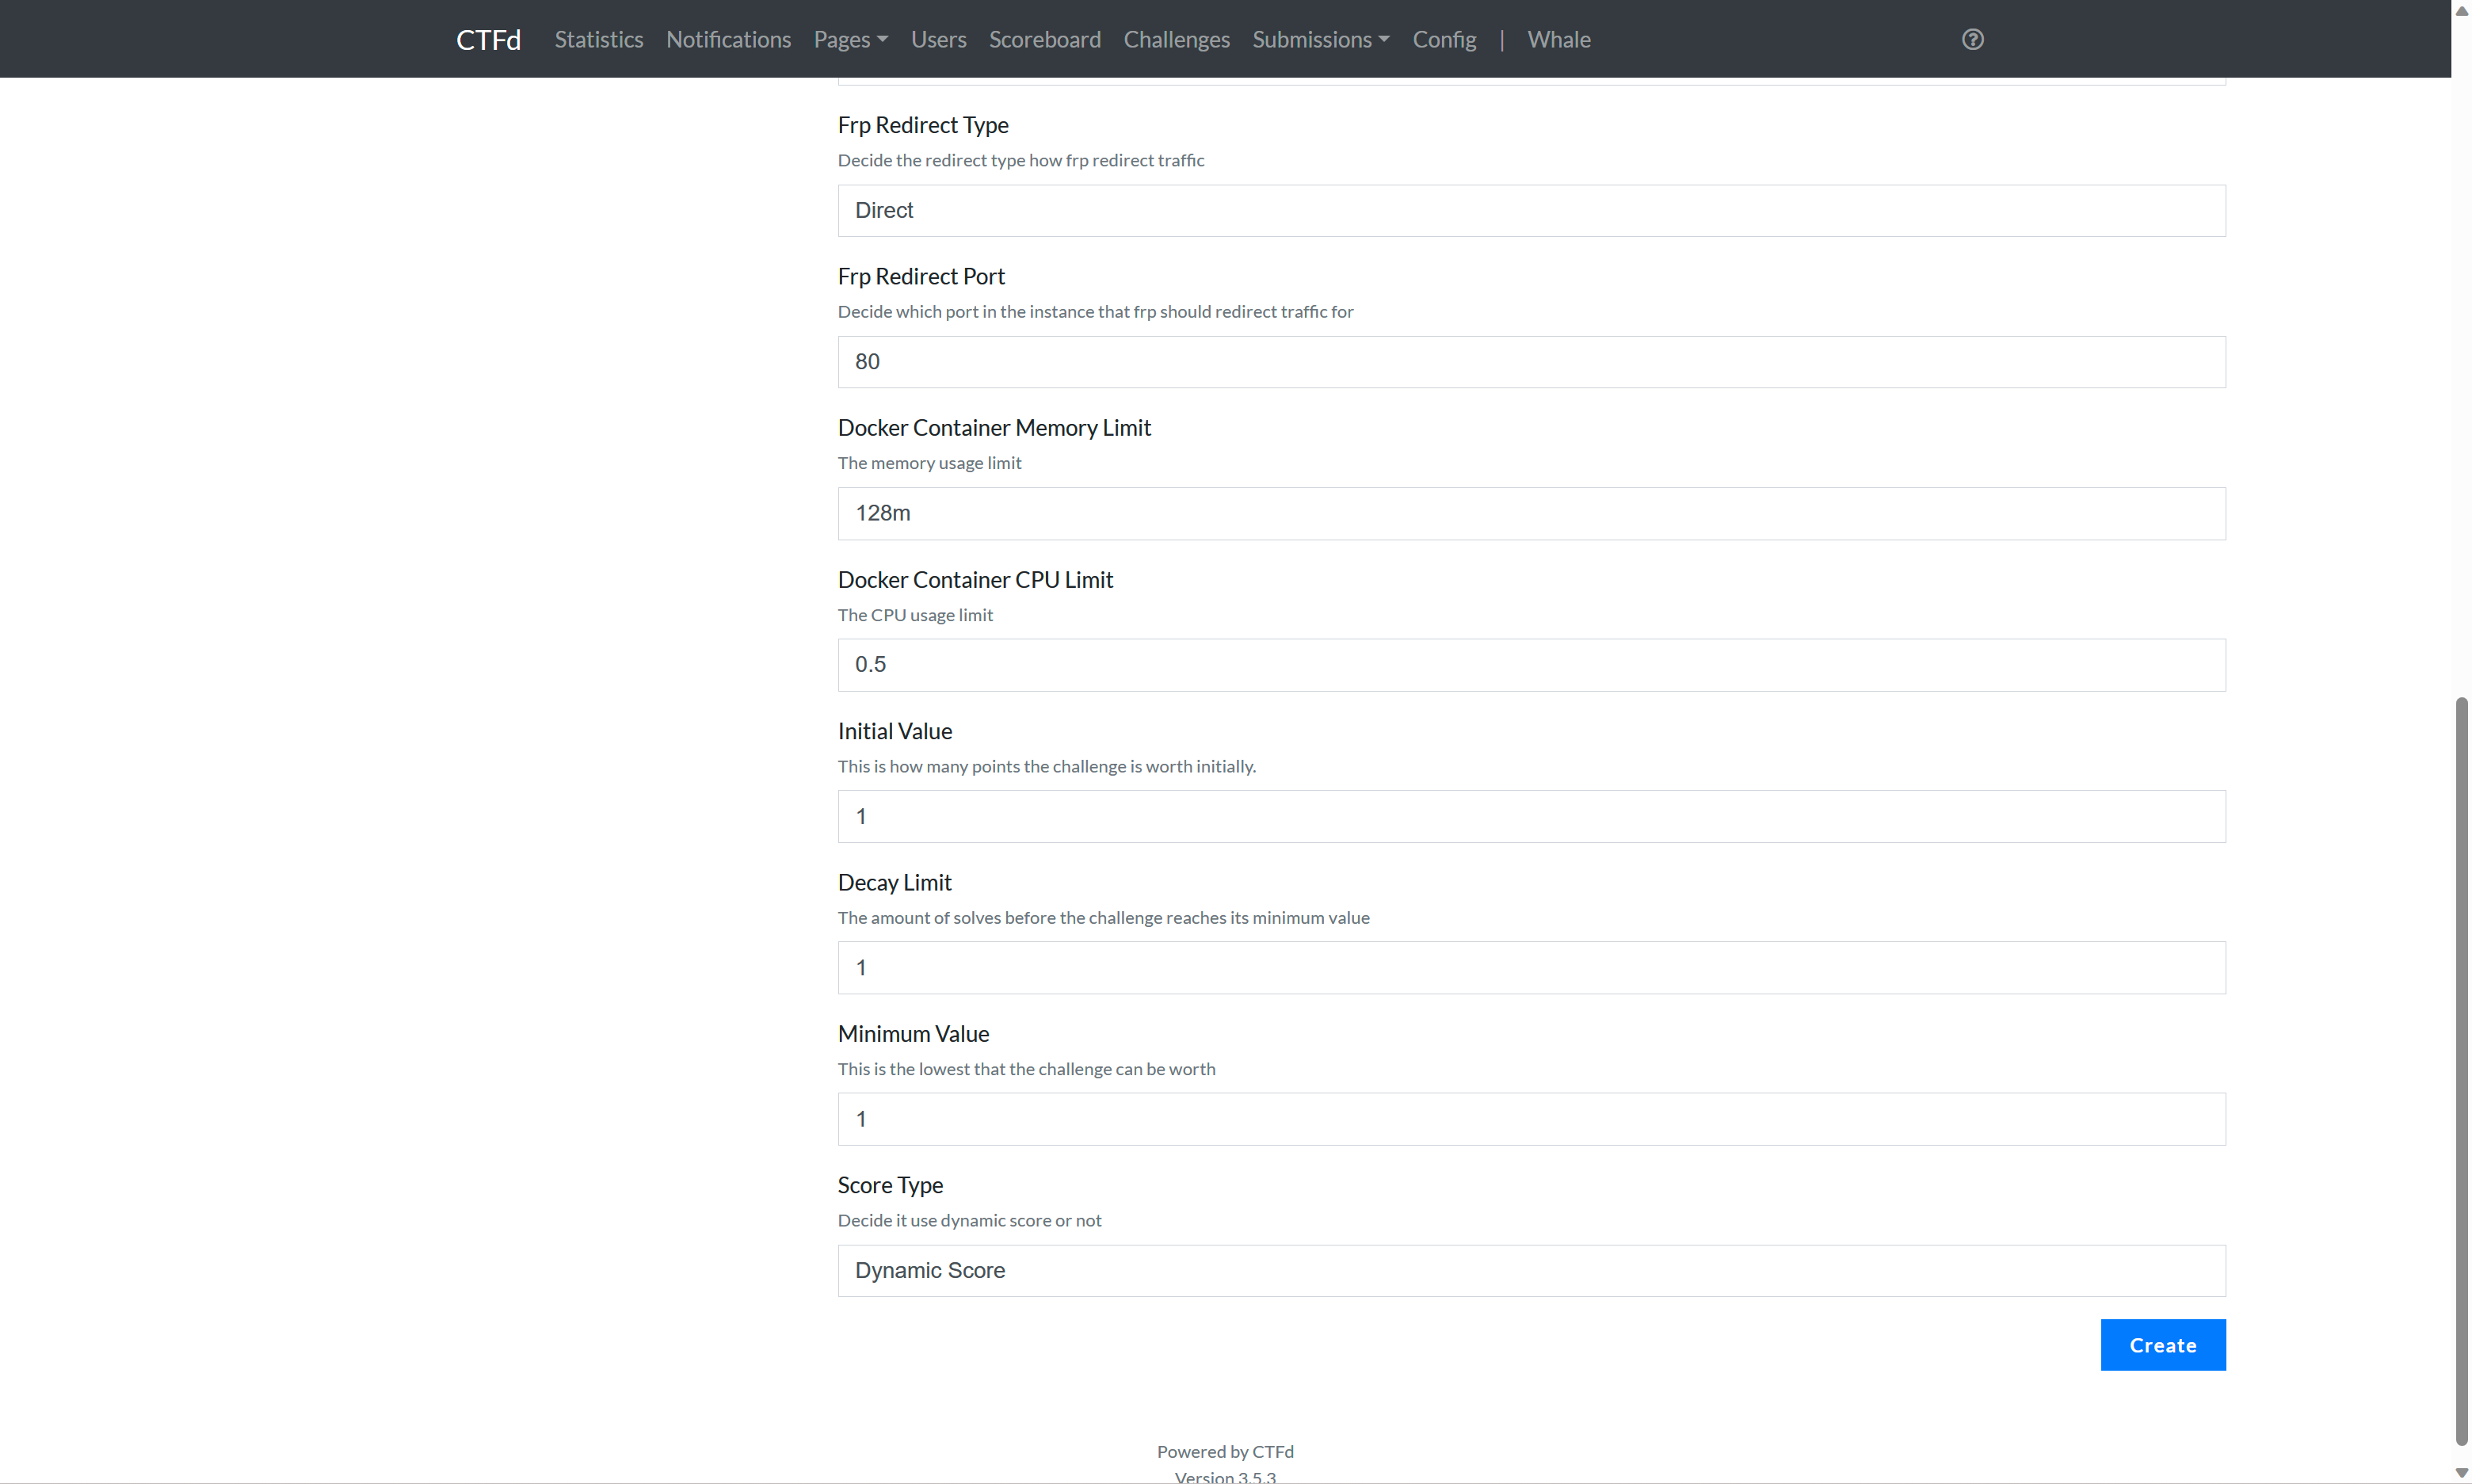
这个不用管,选一下显示就行了。